Buying Guides

Smart Bath Accessories for Spa Style Space that Feels Great
Updated on: 2025-12-09 Choosing the right bath accessories can make your bathroom feel calmer and more useful. This guide shares simple steps to plan your layout, pick reliable materials, and match your style. You will also find tips for storage, water savings, and safe access. By the end, you may feel ready to make small changes that bring lasting comfort and clarity to your routine. Practical Guide to bath accessories Map your layout and routines Choose materials and finishes Prioritize smart storage Support water efficiency and hygiene Plan for safety and accessibility Coordinate style and care Key Advantages Summary & Next Steps Q&A Section What should I choose first when upgrading a bathroom? How can a small bathroom feel more spacious? What are easy cleaning tips for common finishes? About the Author Section About the Author A calm, comfortable bathroom supports your day with ease. Thoughtful choices in organizers, holders, and fixtures can reduce clutter, improve safety, and reflect your personal style. This article offers a gentle, step-by-step approach that works for family spaces, guest baths, or compact layouts. You will find practical suggestions that respect a range of budgets and design preferences. Practical Guide to bath accessories Map your layout and routines It may help to start by observing how the space is used today. Consider where you naturally reach for towels, soap, and skincare. Note any tight corners, door swings, and the height of shelves or mirrors. A simple sketch with measurements can prevent crowded walls and help you choose pieces that fit comfortably. If you are renting, adhesive or over-the-door options may provide flexibility without drilling. Choose materials and finishes Materials influence durability, cleaning, and overall harmony. Solid brass and stainless steel resist corrosion and feel sturdy. Powder-coated finishes, such as matte black or white, add a modern look and tend to hide small marks. Warm metallics like brushed gold or antique brass introduce gentle contrast without overwhelming a neutral palette. To coordinate easily, consider matching hardware with your bathroom faucets so handles, spouts, and bars share a common tone. If you like a timeless look, choose a single finish family and repeat it in towel bars, robe hooks, and paper holders. This approach often creates visual calm by reducing contrast lines. When mixing metals, keep one as the primary finish and the other as a subtle accent, such as a warm mirror frame paired with cool-tone hardware. Prioritize smart storage Open counters can feel soothing and easy to clean. Wall-mounted shelves, over-the-toilet units, and corner caddies keep everyday items within reach while freeing sink space. In showers, a rail system with a handheld option can simplify routines for different family members. If you are updating your shower hardware, exploring coordinated shower sets may help everything work smoothly together. Consider containers that separate categories: one for skincare, one for haircare, and another for guests. Clear jars, labeled bins, or low trays bring order without visual clutter. Hooks behind doors can support robes or quick-dry towels and reduce piles on the floor. Support water efficiency and hygiene Small updates can conserve water and support cleanliness. Foaming or pump dispensers manage soap usage, and aerators maintain a comfortable flow while using less water. Refillable bottles reduce single-use plastics and keep surfaces consistent. If you are looking to improve freshness and personal care, a gentle bidet spray can be a considerate addition that many households appreciate. Ventilation also matters. Good airflow helps towels dry faster and reduces humidity that may affect finishes. If a fan is not available, opening a window or using a small dehumidifier after showers can make a positive difference. Plan for safety and accessibility Comfort and safety can go hand in hand. Non-slip mats near the shower and tub offer steady footing, while a textured bath rug adds warmth. If your home includes children, older adults, or anyone with mobility concerns, consider well-placed grab bars and a handheld shower for ease. Arrange shelves and hooks at reachable heights to reduce stretching or bending. Thoughtful lighting—especially around the mirror—supports grooming and reduces eye strain. Coordinate style and care Design choices feel best when daily care remains simple. Choose finishes that work with your cleaning habits. For example, brushed textures often hide fingerprints better than polished ones. Neutral pieces can blend across seasons, while a few accents—like a wooden tray or a textured cotton basket—add warmth. Keep a small microfiber cloth nearby for quick wipe-downs. To maintain long-term clarity, clean gently with mild soap and water. Avoid harsh abrasives that can scratch surfaces or strip protective coatings. A routine of light, regular care usually prevents buildup and keeps everything looking new without extra effort. Key Advantages Space that feels organized: Clear counters and defined zones reduce visual clutter and make routines smoother. Durable, reliable pieces: Solid metals and quality finishes often resist corrosion and look good for years. Consistent style: Matching hardware and coordinated colors create cohesion and a calm visual line. Water-wise choices: Aerators and refillable dispensers support savings and a balanced flow. Enhanced comfort and safety: Non-slip surfaces, thoughtful lighting, and supportive bars add reassurance. Easy upkeep: Smooth surfaces, simple shapes, and regular light cleaning help everything stay fresh. Curated options in one place: When you are ready to browse, consider Allfixture’s best-selling picks to compare popular styles and finishes. Flexible upgrades: A few well-chosen bath accessories can elevate the room without major renovation. Summary & Next Steps A balanced bathroom often starts with a clear plan: measure your space, note habits, and set a simple style direction. Then choose reliable materials, organize storage, and support water efficiency. Small steps can deliver a more comfortable, welcoming room for daily routines and guests alike. Measure key areas and list your daily essentials. Choose one finish family for a calm, cohesive look. Add practical storage and a few comfort upgrades, such as a soft rug or a handheld shower. Establish a quick weekly wipe-down to keep everything tidy with minimal effort. When you are ready to compare fixtures or explore styles, you might find it helpful to review coordinated collections, especially if you plan a future faucet or shower refresh. Q&A Section What should I choose first when upgrading a bathroom? It can be helpful to start with items you use every day. Towel bars or hooks, a paper holder, and a soap dispenser often provide the biggest improvement with the least effort. From there, consider lighting and mirror placement, and review whether your faucet finish matches your hardware. If you plan to update your sink area soon, browsing coordinated bathroom faucets may simplify long-term decisions. How can a small bathroom feel more spacious? Choose compact organizers and mount them vertically to free counter space. Use lighter colors, slim profiles, and clear containers to reduce visual weight. A handheld shower and a corner shelf can open narrow stalls. Mirrors help reflect light, while a consistent finish throughout the room creates a smooth line for the eye to follow. What are easy cleaning tips for common finishes? Most finishes do well with warm water, mild soap, and a soft cloth. Rinse and dry to reduce spots, especially in areas with hard water. Avoid harsh chemicals and abrasive pads that can dull coatings. For glass and mirrors, a gentle glass cleaner or diluted vinegar solution can keep surfaces clear without streaks. About the Author Section About the Author Written by the Allfixture Editorial Team, specialists in home fixtures and thoughtful bathroom design. We focus on practical, durable solutions that look beautiful and feel comfortable to use. Our guides aim to make decisions easier with clear, friendly advice. Thank you for spending time with us today.
Learn moreBidets for Cleaner Fresher Bathrooms and Happier Homes
Updated on: 2025-12-08 A water-cleansing fixture can make everyday routines feel gentler, cleaner, and more considerate of the environment. This guide explains the benefits, the simple setup process, and common questions so you can make a calm, informed decision. You will find a step-by-step walkthrough, helpful maintenance tips, and links to thoughtfully selected accessories. If you are exploring a soft upgrade for comfort and hygiene, this overview offers a friendly place to start. 1. Key Benefits of bidets 2. Step-by-Step Guide 2.1 Step 1: Assess Your Bathroom Setup 2.2 Step 2: Choose Your Style 2.3 Step 3: Gather Tools and Supplies 2.4 Step 4: Turn Off the Water Supply 2.5 Step 5: Install the T‑Valve and Hose 2.6 Step 6: Mount the Sprayer or Seat Attachment 2.7 Step 7: Turn On Water and Test 2.8 Step 8: Adjust, Care, and Maintain 3. FAQ Section 3.1 Will a cleansing sprayer fit my toilet? 3.2 How much water does it use? 3.3 Is maintenance complicated? 3.4 Can renters install one without damage? 4. Summary & Final Thoughts 5. About the Author For many households, bidets spark curiosity because they promise a clean, gentle experience while using less paper. If you have wondered whether a water-cleaning upgrade is right for your bathroom, this considerate guide aims to help. We will walk through the benefits, the installation steps, and common questions in calm, clear language. By the end, you may feel ready to try a simple sprayer or seat attachment that suits your space and preferences. Key Benefits of bidets Comfortable cleansing: Water offers a soft, refreshing clean that feels kind to skin. Many people appreciate the soothing sensation, especially during everyday routines. Less paper usage: Gentle rinsing can reduce reliance on toilet paper, which may support a tidier bathroom routine and lessen waste. Budget-friendly over time: Simple sprayers and seat attachments are usually affordable to install, and the potential savings on paper can add up gradually. Easy to integrate: Many modern sprayers connect to the existing water supply with basic fittings, allowing a neat setup in most bathrooms. More control: Handheld sprayers and adjustable nozzles give you choice over angle and flow. This can help you fine-tune comfort and precision. Thoughtful design choices: From minimal hand sprayers to sleek seats with features, there is usually an option that matches your bathroom style. Simple upkeep: With occasional wiping and periodic checks of hoses and fittings, most systems remain reliable for daily use. Step-by-Step Guide Step 1: Assess Your Bathroom Setup Begin by noting your toilet’s shape, the location of the shut-off valve, and how much clearance you have beside the bowl. This helps you choose a sprayer or seat attachment that fits well and routes the hose neatly. If your space is compact, consider a slim sprayer with a wall or tank hook for tidy storage. Step 2: Choose Your Style There are two popular paths: a handheld toilet sprayer or a seat attachment with a built-in nozzle. Handheld sprayers offer flexible control and a fast install. Seat attachments provide a fixed nozzle and often include features like adjustable flow. To explore streamlined sprayer options, you may find the bidet spray collection helpful for comparing finishes and fittings. Step 3: Gather Tools and Supplies Most installations use a T-valve, a braided hose, and either a sprayer handle or a seat-mounted nozzle system. Useful tools may include an adjustable wrench, a soft cloth, and plumber’s tape for threaded connections. Having a small towel nearby is handy to catch any residual water when you disconnect the supply line. Step 4: Turn Off the Water Supply Locate the shut-off valve near the base of the toilet and turn it clockwise until it stops. Gently flush once to release pressure in the line. This step can make the process calmer and reduce drips when you detach the hose from the tank. Step 5: Install the T‑Valve and Hose Unscrew the existing hose from the toilet tank’s fill valve. Hand-thread the T‑valve to the fill valve first, then reattach the original hose to one branch of the T. Next, connect the new braided line to the remaining branch for the sprayer or seat. Snug each connection carefully with a wrench, taking care not to overtighten. Plumber’s tape on male threads can help create a reliable seal. Step 6: Mount the Sprayer or Seat Attachment If you chose a handheld sprayer, place the holder on the tank’s side or wall using the hardware provided. For seat attachments, remove the toilet seat, center the attachment over the bolt holes, and reinstall the seat through the bracket. Consider coordinating finishes with nearby fixtures for a cohesive look; browsing complementary bathroom faucets or shower sets may spark ideas for a unified style. Step 7: Turn On Water and Test Open the shut-off valve slowly. Check each connection for moisture. If you notice a droplet, gently retighten that fitting or add a bit of plumber’s tape and try again. Test the sprayer or nozzle at low pressure first, then adjust the flow to a comfortable level. This careful start helps confirm everything is secure before regular use. Step 8: Adjust, Care, and Maintain After the first day or two, recheck connections for peace of mind. Wipe the sprayer head or nozzle periodically with a soft cloth, and avoid harsh chemicals that could dull finishes or wear seals. If your water has mineral content, a gentle vinegar wipe on metal parts may help prevent buildup. With a little routine care, your system will stay fresh and dependable. FAQ Section Will a cleansing sprayer fit my toilet? Most standard two-piece toilets are compatible with a T‑valve and braided hose. Many one-piece designs work as well, though hose routing can be tighter. If you have limited clearance, a compact sprayer with a flexible line is often the most forgiving choice. Reviewing product measurements against your space tends to avoid surprises. How much water does it use? Use varies by flow setting and duration, but it is typically modest because you only run water briefly. Starting with a gentle stream and adjusting as needed can keep usage low while maintaining comfort. This balanced approach supports both cleanliness and mindfulness around resources. Is maintenance complicated? Care is generally simple. Periodically check fittings, give the sprayer head or nozzle a quick wipe, and ensure the hose is not pinched or kinked. If you notice drips over time, a light retightening or fresh plumber’s tape usually resolves the issue. Regular yet easy attention helps everything feel reassuringly dependable. Can renters install one without damage? Many handheld sprayers are appealing to renters because they connect to existing plumbing without drilling permanent holes. A tank-mounted hook keeps storage tidy and reversible. If you move, you can often restore the original setup by removing the T‑valve and reattaching the original hose. Summary & Final Thoughts Adopting a gentle water-cleaning routine can bring comfort, control, and calm to daily life. The setup is approachable for many bathrooms, and maintenance is usually straightforward. If you would like to compare styles and finishes, you might appreciate browsing our best sellers and learning from the practical guides in our buying guides. With a few thoughtful choices, bidets can become a graceful part of your space. About the Author Written by the Allfixture Editorial Team, specializing in bathroom and kitchen fixtures that balance comfort, style, and value. We enjoy helping readers choose practical upgrades with clarity and care. Thank you for spending time with us today, and we hope your next project feels wonderfully simple.
Learn more
Smart Toilet Trends: How to Pick Durable, Quiet Models
Updated on: 2025-12-07 Planning a bathroom refresh can feel complex, yet a calm approach makes it manageable. This guide covers space planning, bowl shapes, flushing options, and upkeep so you can choose confidently and maintain lasting performance. It also spotlights a gentle, hygienic add-on that pairs beautifully with modern toilets. You will find practical steps, personal insights, and answers to common questions to simplify your decision. Please feel free to adapt any step to suit your home and comfort level. Table of Contents 1. Product Spotlight: A Bidet Spray for Toilets 2. Step-by-Step How-To 2.1 Step 1: Assess your space and plumbing 2.2 Step 2: Choose bowl shape and seat height 2.3 Step 3: Select a flushing system 2.4 Step 4: Focus on water efficiency and comfort 2.5 Step 5: Pair with helpful accessories 2.6 Step 6: Plan a smooth installation 2.7 Step 7: Care and maintenance 3. Personal Experience 4. Summary & Recommendations 5. Q&A Section 5.1 What is the difference between one-piece and two-piece designs? 5.2 How can I reduce odors and stains without harsh chemicals? 5.3 Is a bidet attachment difficult to add later? 6. About the Author Choosing a modern restroom fixture involves a few thoughtful decisions. Space, comfort, water use, and ease of cleaning all matter. With a clear plan, you can select a commode that fits your home, then keep it looking and working its best. Below, you will find a concise product spotlight, an easy process to follow, and practical tips gathered from real-life use. Whether you prefer a compact round bowl for small rooms or an elongated shape for comfort, these steps aim to help you move forward with confidence and care. Product Spotlight: A Bidet Spray for Toilets A well-designed bidet sprayer adds gentle cleansing, reduces paper waste, and supports everyday comfort. If you are exploring upgrades, a handheld sprayer is a simple way to elevate hygiene and keep the bowl cleaner between deep scrubs. Many households appreciate the flexibility: the spray can assist with personal care, quick rinsing after routine cleaning, and even small tasks like filling a mop bucket without splashing. Compatibility is straightforward for most standard shut-off valves, and the learning curve is very light. Look for durable metal construction, a leak-resistant hose, and a smooth trigger that allows precise control. Adjustable water flow helps each person find a comfortable setting. When installed with care, a sprayer becomes a low-profile companion to your porcelain fixture. To browse options, consider the thoughtfully curated bidet spray collection at Allfixture. If you are coordinating finishes across your space, matching hardware with your sink area can create a unified look; Allfixture’s range of bathroom faucets offers styles that complement both classic and modern bathrooms. Step-by-Step How-To Step 1: Assess your space and plumbing Begin by measuring the rough-in (the distance from the finished wall to the center of the floor drain). Common rough-ins are 12 inches, though some homes vary. Check door swing, clearance in front of the bowl, and space on each side. Confirm shut-off valve condition and water line placement; this helps you choose a compatible model and plan any small adjustments in advance. Step 2: Choose bowl shape and seat height Round-front bowls fit snug powder rooms, while elongated designs offer more sitting comfort. Seat height also matters. A comfort-height seat, often around chair height, can be easier on the knees and back for many adults. If you have mixed needs at home, a standard height may feel better for children. A soft-close seat is a nice touch to reduce noise and wear. Step 3: Select a flushing system Gravity-fed systems are quiet and reliable for daily use. Pressure-assist models bring extra force for clearing, which can be helpful for larger households, though they may sound a bit louder. Consider a dual-flush option to choose between a lighter or fuller flush depending on the task. Smooth bowl glazing, rimless designs, and optimized trapways further support clean, efficient performance. Step 4: Focus on water efficiency and comfort Lower gallons-per-flush ratings help conserve water, which is kind to both the environment and utility bills. Look for a comfortable seat contour, and if you sit for longer periods, a quiet close lid and stable hinges can add small but noticeable comfort. A compatible bidet attachment or sprayer provides gentle cleansing and can help reduce paper, which many households appreciate for both softness and sustainability. Step 5: Pair with helpful accessories Thoughtful accessories complete the experience. A handheld sprayer offers hygienic rinsing and makes cleaning faster. Matching finishes on towel bars, paper holders, and vanity taps can bring harmony to the room. For a cohesive sink area, browse coordinated bathroom faucets. If you are also refreshing the shower, a unified look with durable shower sets can tie the entire space together. Step 6: Plan a smooth installation Set aside time, gather tools, and read the manufacturer’s guide patiently. Protect the floor with a towel, turn off the water, and keep a bucket nearby for any remaining water in the old fixture. If you are adding a sprayer, use quality T-adapters and thread seal tape as recommended by the product instructions. Gentle, even tightening helps prevent leaks. If anything feels uncertain, a licensed professional can assist with care. Step 7: Care and maintenance Regular, gentle cleaning preserves finish and function. Choose non-abrasive cleaners and soft cloths or brushes to protect glazing. A quick weekly wipe of hinges and handle areas helps prevent buildup. For sprayers, briefly check connections each season, and relieve pressure at the trigger after use. Small, consistent habits keep your bathroom feeling fresh with minimal effort. Personal Experience When I updated a compact guest bath, space and quiet operation were my main concerns. I chose a round-front design to keep walking room clear and paired it with a handheld sprayer for gentle hygiene. The sprayer quickly became everyone’s favorite detail; it helped with tidy cleanups and reduced paper use without changing routines. The biggest surprise was how much easier weekly cleaning became. A short rinse after a quick scrub kept the bowl looking new, and the soft-close seat spared the late-night clatter that sometimes startles light sleepers. Summary & Recommendations Thoughtful planning leads to a bathroom that feels calm, clean, and easy to live with. Measure the rough-in, allow comfortable clearances, and pick a bowl shape and seat height that suit your household. Choose a dependable flush, and consider a dual-flush model for flexibility. A handheld sprayer adds gentle cleansing and supports simple upkeep. For a cohesive finish, consider coordinated fixtures like shower sets and browse Allfixture’s best selling selections for proven favorites. Q&A Section What is the difference between one-piece and two-piece designs? One-piece models integrate the tank and bowl, resulting in fewer seams and a sleek profile that is often easier to wipe clean. Two-piece versions separate the tank and bowl, which can make transport and setup easier in tight spaces and sometimes offer broader parts compatibility. Both can deliver excellent performance; the best choice depends on your priorities for cleaning, appearance, and installation logistics. How can I reduce odors and stains without harsh chemicals? Consistent, gentle care works well. Use non-abrasive cleaners, a soft brush, and warm water for regular wipes. A quick sprayer rinse after light scrubbing helps lift residue from the bowl. Good ventilation also helps moisture dissipate. If you use in-tank products, choose options formulated to be safe for glazing and internal components to preserve seals and finishes. Is a bidet attachment difficult to add later? Most handheld sprayers connect at the shut-off valve with a T-adapter and flexible hose. The process is usually straightforward with basic tools and careful reading of the instructions. If you are unsure about fit or valves, a professional can assist. Choosing a quality sprayer with metal fittings and a smooth, controllable trigger improves comfort and long-term reliability. About the Author Allfixture Editorial Team The Allfixture team writes practical guides on bathroom hardware, water-saving fixtures, and everyday home upgrades. We test, compare, and organize information so you can make calm, confident choices. Thank you for spending time with this guide—we hope it brings clarity and comfort to your next refresh.
Learn more
Showers Essentials A Practical Guide to Bathroom Upgrades
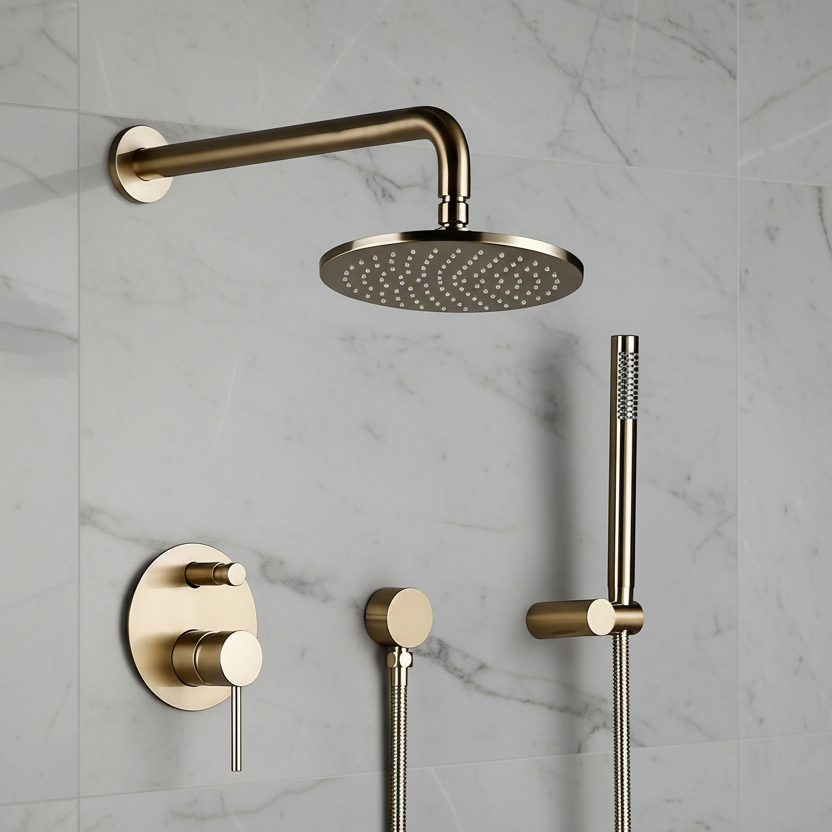
Updated on: 2025-12-06 A well-chosen shower system can bring daily comfort, conserve water, and elevate your bathroom style without fuss. This guide offers a calm, practical path to finding the right fit for your space, preferences, and budget. You will discover how to measure correctly, compare key features, and plan a smooth installation. The goal is to help you make a confident, informed choice that feels good every day. Table of Contents Introduction Buyer’s Checklist for Showers Step-by-Step Guide FAQ What should I check before buying a shower set? How do thermostatic and pressure-balance valves differ? How can I keep my shower looking new? Closing Thoughts & CTA About the Author Introduction Whether you are refreshing a compact bath or designing a spa-like retreat, choosing among modern showers can feel complex. There are many styles, materials, and controls to consider, and small details often shape everyday comfort. This article offers a gentle, step-by-step path to compare options, plan for installation, and match form with function. You will find a concise checklist, a simple process to follow, and common questions answered in plain language. Buyer’s Checklist for Showers Use this practical checklist to narrow your choices with clarity and ease. Measure your space carefully: Note ceiling height, wall widths, and door swings. Confirm rough-in depth and stud locations for safe mounting. Check water pressure: Confirm that your supply pressure supports your preferred spray style. Rain heads often benefit from moderate pressure, while multi-spray systems may need more. Choose a configuration: Decide between a single overhead head, a handheld on a slide bar, or a dual setup with a diverter. Keep daily routines in mind. Valve compatibility: Match the trim to the valve brand and type. If replacing only trim, ensure the internal valve is compatible to avoid extra work. Control style: Consider a simple single-handle pressure-balance control or a thermostatic option for precise temperature stability. Materials and build: Solid brass bodies and metal fittings enhance durability. Stainless steel and quality polymers can also perform well when engineered properly. Finish selection: Choose a finish that complements your bath—polished chrome, brushed nickel, matte black, or warm antique brass. Aim for consistency with other fixtures. Flow rate and efficiency: Look for water-saving models that balance comfort with conservation. Aerated and optimized spray designs can feel satisfying while using less water. Spray experience: Consider droplet size, spray density, and coverage. A rain-style head offers a gentle cascade, while concentrated jets create a brisk rinse. Ease of maintenance: Rubber nozzles and wipe-clean finishes reduce buildup. Fewer seams and accessible parts simplify care. Safety and comfort: Scald protection, ergonomic handles, and a stable slide bar improve everyday comfort for all ages. Installation needs: Note whether you will need a new rough-in valve, diverter, or additional support blocking. Planning ahead can help minimize surprises. Warranty and support: Check coverage length and service options. Clear documentation and available parts make future care easier. Style harmony: Coordinate the set with sink and tub hardware for a cohesive look. Explore complementary bathroom faucets to complete the space. Budget and total value: Include the valve, trim, head, arm, holder, hose, and any accessories in your estimate. Durability and long-term reliability often justify a slightly higher initial cost. Ready-to-go options: To simplify shopping, consider complete shower sets that bundle compatible parts for a smoother installation. Product example to review: A durable, coordinated option is the solid brass set with a handheld sprayer for flexible use. Step-by-Step Guide Follow these simple steps to move from ideas to a comfortable, reliable installation. Define your goals: Decide whether you want a spa-like experience, a quick daily rinse, or a balanced mix of both. Measure and map: Record wall dimensions, ceiling height, and stud locations. Note your current rough-in valve type and depth. Assess water supply: Check household pressure and temperature limits. This helps you choose the right head size and spray pattern. Select the spray hardware: Pick an overhead head, a handheld with a slide bar, or a dual setup. Consider reach and adjustability for all users. Choose the control system: Pressure-balance valves help keep temperature steady when pressure fluctuates. Thermostatic controls maintain a set temperature with fine precision. Confirm compatibility: If you are keeping the existing valve, match trim and brand. If changing valves, confirm wall access and rough-in requirements. Pick materials and finish: Solid brass and robust coatings improve longevity. Match finishes across the room for a calm, unified look. Plan the layout: Determine head height, hand shower reach, and diverter placement. Ensure comfortable access without stretching or bending. Include essentials: List valve, trim kit, head and arm, handheld and hose, slide bar, and any elbow or diverter. Double-check part numbers to avoid mismatches. Order with care: Where helpful, choose curated best sellers to streamline decisions with proven favorites. Dry-fit before finishing: Test alignment and reach with parts held in place. Adjust positions now to avoid later changes. Install and test: After mounting, run water to purge debris. Check for even spray, smooth handle travel, and leak-free joints. Make small adjustments for the best day-to-day feel. Maintain gently: Wipe surfaces after use, clean nozzles periodically, and check connections annually. Simple care helps preserve performance and finish. FAQ What should I check before buying a shower set? Start with measurements, water pressure, and your current valve type. These details guide the size of the head, the choice of control, and the number of components you can support. Next, consider materials and finish for durability and style consistency. Finally, review installation needs and warranty coverage. When you prefer a single-package solution, browse curated shower sets to reduce guesswork. How do thermostatic and pressure-balance valves differ? Pressure-balance valves help prevent sudden temperature swings by adjusting to changes in hot and cold pressure. They are simple and reliable for everyday use. Thermostatic valves let you set an exact temperature and keep it steady, even when pressure fluctuates. They add comfort for multi-user households and are helpful when you want precise control. Either option can be effective; it depends on your preference for simplicity or precision. How can I keep my shower looking new? Wipe fixtures with a soft cloth after use to reduce water spots. Clean spray nozzles gently to prevent mineral buildup; many designs have flexible tips for quick care. Use non-abrasive cleaners suited to your finish to avoid dulling the surface. Periodically check connections and seals, and replace worn washers or cartridges as needed to maintain smooth performance. Closing Thoughts & CTA Choosing the right setup is about comfort, ease, and style that lasts. With careful measurements, a clear configuration, and materials suited to your home, daily routines can feel calm and reliable. If you would like a simple starting point, explore coordinated shower sets or review a durable example like this solid brass set. You might also compare complementary bathroom faucets to finish the look with confidence. About the Author Allfixture is a home fixture specialist focused on durable materials, thoughtful design, and clear guidance for everyday spaces. Our team researches bath hardware, valves, and compatible trim to make selection easier. We enjoy helping you find fittings that balance comfort, efficiency, and style. Thank you for reading, and we hope your next upgrade feels effortless. New to shower systems? Start with our complete buyer's guide: How to Choose a Complete Shower System.
Learn more
Sinks by Style: A Complete Guide to Finding the Right Fit
Updated on: 2025-12-05 Choosing the right basin for your kitchen or bathroom can feel complex, yet a little planning brings clarity. This guide walks through measurements, materials, installation notes, and care routines in a simple, friendly way. You will also find practical tips from showroom experience and answers to common questions. By the end, you will feel comfortable comparing options and planning your upgrade with confidence. Table of Contents Introduction Paragraph Step-by-Step Guide for Sinks Step 1: Map your layout and daily use Step 2: Measure for fit and mounting style Step 3: Choose a material for durability and care Step 4: Plan faucet holes and accessories Step 5: Consider noise, drainage, and ergonomics Step 6: Prepare for installation and maintenance Tips FAQs How do I decide between single and double bowls? What mounting style works best for small spaces? Which materials are easiest to maintain? Do I need a new faucet when I upgrade the basin? Wrap-up & Final Thoughts About the Author Introduction Paragraph A quality basin quietly supports everyday life. It handles food prep, tooth brushing, quick cleanups, and more. The right choice balances form, function, and care requirements. While there is no single “best” model for every home, there is a best fit for your habits, layout, and style. In the following guide, you will find a gentle, stepwise approach that helps you compare options without stress. You can move through each step at your own pace, review examples, and note what matters most for your home. To support your planning, we will cover measurements, bowl configuration, materials, mounting methods, sound control, and drainage details. We will also touch on pairing with compatible hardware and choosing care routines that extend service life. If you would like to explore curated hardware that complements your choice, consider browsing kitchen faucets, bathroom faucets, and shower sets from Allfixture as you plan. Step-by-Step Guide for Sinks Step 1: Map your layout and daily use Begin by observing how you use the workspace. In a kitchen, do you often fill large pots or wash sheet pans? In a bath, is the vanity compact, or do you style hair and need clear counter space? Note appliance positions, door swings, and the distance to dishwashers or trash pull-outs. A simple sketch with rough measurements and traffic patterns will surface what size and shape make life easier. Choose a single bowl for uninterrupted space, or consider two bowls if you regularly separate tasks. Step 2: Measure for fit and mounting style Measure cabinet width, countertop depth, and cutout size. Leave room for faucet clearance behind the bowl and, in kitchens, space for accessories like a deck-mounted sprayer or filtered-water tap. Popular mounting types include top-mount (drop-in), undermount, and apron-front. Top-mount is forgiving and suits many counters. Undermount provides a seamless wipe-in edge and a clean look. Apron-front adds presence and shifts the working edge forward, which some find more comfortable for long prep sessions. Step 3: Choose a material for durability and care Common materials include stainless steel, fireclay, porcelain, natural stone, and solid surface. Stainless is versatile, light, and resilient; look for thicker gauges for a quieter feel and better dent resistance. Fireclay and porcelain offer a classic look with a smooth, easy-to-wipe glaze. Stone is distinctive and heavy, and it may require sealing. Solid surface blends modern design with repairable finishes. Consider your cleaning routine and water quality. If hardness or minerals are a concern, favor smooth finishes that resist spotting. Step 4: Plan faucet holes and accessories Match hole count and spacing to your chosen hardware. Single-hole faucets save space and simplify cleaning. Bridge or widespread styles suit classic baths. If you want filtered water at the same station, select a faucet with a dedicated purified line or plan an auxiliary spout. For inspiration, you can explore Allfixture’s best-selling fixtures or browse the brand’s focused buying guides to confirm compatibility and finishes. Step 5: Consider noise, drainage, and ergonomics Sound-dampening pads or undercoatings reduce clatter in metal bowls. Look for smart drainage design, such as rear-set drains that free cabinet space and help water flow even when a pan rests in the bowl. Gentle corners ease cleaning; tighter corners increase capacity. Depth matters for comfort: deeper bowls hold more but may require a slight bend. Balance volume with posture so daily tasks feel easy on your back and shoulders. Step 6: Prepare for installation and maintenance Before installation, confirm support for heavy materials and apron-front profiles. Dry-fit the bowl and accessories, test clearance, and protect surrounding surfaces. After installation, create a simple care plan. A soft sponge, mild dish soap, and microfiber cloth handle most needs. Rinse after use, especially in areas with mineral-rich water, and dry when possible to reduce spotting. For metal, use non-abrasive cleaners and follow the grain. For ceramic, avoid impacts and use gentle pads to protect the finish. Tips Keep a small caddy with a soft brush, mild soap, and microfiber to encourage quick wipe-downs. Use a grid or mat to protect the base from cookware and reduce noise. Match faucet reach to bowl size so the water stream lands near the center. Consider a pull-down sprayer for faster rinsing and easier corner cleaning. Choose finishes that echo nearby hardware for a calm, unified look. Confirm garbage disposal size and mounting before finalizing the bowl depth. In compact baths, a wall-mount faucet frees counter space and simplifies cleaning. When upgrading a kitchen, check whether a filtered line or accessory sprayer might add meaningful convenience. FAQs How do I decide between single and double bowls? Pick a single bowl if you often handle large pots, baking sheets, or meal prep that needs open space. Choose two bowls if you regularly separate tasks, such as soaking and rinsing, or want a dedicated area for food prep. Consider your cabinet size and counter workflow before deciding. What mounting style works best for small spaces? Undermount and wall-mount pair well with tight counters because they preserve clean lines and usable surface area. Top-mount can also fit nicely if you already have a cutout and want a straightforward replacement. Measure faucet clearance carefully to avoid crowding. Which materials are easiest to maintain? Stainless and high-quality glazed fireclay are both easy to clean with mild soap and water. Solid surface is also practical and can be refreshed if lightly scratched. If your water is mineral-heavy, favor smooth finishes and keep a microfiber cloth nearby for quick drying. Do I need a new faucet when I upgrade the basin? Not always, but many homeowners appreciate updating both at once for a cohesive fit and fresh sealing. Confirm hole count, reach, and finish compatibility. If you want enhanced functionality, explore Allfixture’s range of bathroom faucets and kitchen faucets to find a matching style. Wrap-up & Final Thoughts Thoughtful planning makes an upgrade smoother and more rewarding. Start with your space and daily routines, then select materials and features that support those habits. Confirm measurements, mounting style, and faucet compatibility before installation. With consistent, gentle care, your chosen piece will remain welcoming and reliable for many years. If you could use more guidance while comparing options, Allfixture’s curated selections and learning resources are designed to support a calm, confident choice—so your new sinks feel right at home. About the Author Written by the Allfixture Editorial Team. We specialize in practical, design-forward advice for kitchen and bath fixtures that fit everyday life. Our goal is to help you choose with clarity and care. Thanks for reading—wishing you an easy, enjoyable upgrade.
Learn more
Sinks That Shine A Guide to Styles Materials and Setup
Updated on: 2025-12-04 Choosing the right fixtures for kitchens and bathrooms can feel complex, especially when balancing style, durability, and easy care. This gentle guide explains materials, mounting options, sizing, and maintenance so you can pick and look after sinks with confidence. You will also find a step-by-step process, quick answers to common questions, and helpful resources. The goal is to support you in creating a space that feels clean, calm, and long-lasting. 1. How to Choose and Care for Your Basin Material comparison Mounting styles Size and ergonomics Noise reduction and accessories Care basics 2. How-To Steps 3. FAQ What is the easiest basin material to maintain? How can I prevent stains and water spots? When should I replace a basin instead of repairing it? 4. Closing Thoughts 5. About the Author Well-chosen fixtures influence how a room feels every day. From morning routines to evening cleanups, the right basin, matched with a compatible faucet and simple upkeep plan, can make care feel easy and reassuring. This article offers a considerate walkthrough of features, common materials, installation notes, and cleaning methods. You will also find links to explore matching kitchen faucets, coordinated bathroom faucets, and curated shower sets. With a thoughtful selection and routine maintenance, sinks remain reliable, hygienic, and inviting for years. How to Choose and Care for Sinks Material comparison Different materials offer distinct strengths. Stainless steel is widely appreciated for resilience, light weight, and simple cleaning. Look for thicker gauges to reduce noise and improve dent resistance. Fireclay and porcelain provide a smooth, glossy surface and classic look; they resist high temperatures and everyday stains but benefit from gentle handling to avoid chips. Granite composite is sturdy and scratch resistant with a soft-matte feel; darker tones hide marks well and can make crumbs less visible. Solid stone, such as marble or soapstone, offers unique veining and a premium feel; it may require sealing and gentler cleaners. Copper brings warmth and a living finish that develops character over time, and it prefers pH-balanced care. Mounting styles Mounting influences both appearance and cleaning. Undermount installations create a seamless edge, making it easier to wipe crumbs directly from the countertop. Drop-in (top-mount) models are straightforward to install and can be replaced with minimal disruption. Vessel bowls sit above the counter and act as a design focal point; they often pair well with taller faucets. Apron-front (farmhouse) designs offer a deep, spacious basin and a distinctive front panel suited to traditional or modern rustic kitchens. Wall-mounted options can free up counter space in small bathrooms and create an airy look. Size and ergonomics Choose dimensions that complement your counter depth and daily tasks. In kitchens, a deeper bowl can accommodate large pots, baking trays, and cutting boards, while dual-bowl layouts help separate food prep from washing. For bathrooms, consider space for handwashing, face cleansing, and accessories like soap dispensers. The rim height and distance to the faucet should feel comfortable for frequent use, especially for households with varied heights. Measure carefully, including cabinet clearance and plumbing placement, to make installation smoother. Noise reduction and accessories Sound-dampening pads or undercoating help reduce clatter from dishes and running water, particularly in stainless models. Useful accessories include protective bottom grids to prevent scratches, drain strainers to catch debris, and cutting boards designed to fit over the basin. A good faucet pairing also improves usability—pull-down sprayers help rinse corners and tall pots, while touch or lever controls support easy operation. To compare options, browse versatile kitchen faucets and refined bathroom faucets for matching finishes and spout heights. Care basics Gentle, regular cleaning preserves the finish and keeps surfaces fresh. Most basins tolerate a mild dish soap solution, a soft sponge, and warm water for daily wipe-downs. Avoid harsh abrasives, steel wool, and strong acids that may etch or dull finishes. For limescale, white vinegar diluted with water helps on many surfaces; test a small spot first and avoid prolonged contact on natural stone or specialty finishes. Periodically check for leaks at seals and drains, and refresh caulk or sealant as needed to prevent moisture intrusion. For a cohesive, low-maintenance bathroom plan, you may also explore coordinated shower sets and browse practical best sellers that pair well with your chosen basin style. How-To Steps 1. Clarify needs and placement: Note who will use the fixture, how often, and for which tasks. Consider counter depth, cabinet size, and the reach of the faucet. 2. Measure carefully: Record cutout dimensions, bowl depth, and clearance for plumbing, disposal units, or water filters. Confirm the number of holes required for your faucet and accessories. 3. Select material and finish: Choose a material that fits your cleaning style and tolerance for patina or marks. Align the finish with nearby hardware for a cohesive look. 4. Choose a mounting style: Pick undermount for a clean edge, drop-in for easier replacement, vessel for visual impact, or apron-front for generous capacity and ergonomic access. 5. Match the faucet: Confirm spout height, reach, and spray options. Balance function and form by exploring compatible kitchen faucets or elegant bathroom faucets. 6. Prepare for installation: Turn off water, protect countertops, and gather tools. Dry-fit the basin and hardware before sealing to ensure alignment and level placement. 7. Seal thoughtfully: Use the manufacturer-recommended sealant or caulk, apply an even bead, and wipe excess gently. Allow full cure time to prevent moisture intrusion. 8. Establish a care routine: Wipe daily with mild soap and a soft cloth. Each week, do a deeper clean and inspect the drain and strainer for buildup. 9. Review seasonally: Check caulk lines, mounting clips, and supply lines. Refresh sealants and replace worn accessories to keep everything working smoothly. FAQ What is the easiest basin material to maintain? Stainless steel and granite composite are among the most forgiving. Stainless is lightweight and resists heat; it benefits from soft cloths and mild soap. Granite composite offers scratch resistance and a uniform appearance that hides minor marks. If you prefer a high-gloss look, fireclay and porcelain are also practical with gentle care. The best choice is the one that suits your cleaning habits and desired finish. How can I prevent stains and water spots? Daily wipe-downs with a soft cloth reduce mineral deposits. After heavy use, a quick dry helps prevent spots, especially in hard-water regions. Use a gentle cleaner weekly, and place a protective grid in the bowl to limit abrasion. For limescale, try a diluted vinegar rinse on compatible surfaces, then rinse well and dry. Avoid strong acids, bleach blends, or abrasive pads that could dull the finish. When should I replace a basin instead of repairing it? Consider replacement when cracks, chips, or deep scratches affect watertightness or hygiene, or when repeated leaks suggest a failing seal or mounting system. If repairs become frequent or costly, a new unit may offer better performance and long-term peace of mind. Replacement can also be a graceful way to update style, improve capacity, and match modern hardware across the room. Closing Thoughts With patient selection, careful measuring, and a simple care routine, your basin can stay dependable and beautiful for years. If it feels helpful, explore matching fixtures like shower sets and curated best sellers to round out the space. A few thoughtful choices today can make everyday tasks feel easier and more pleasant. About the Author The Allfixture Editorial Team shares practical, design-forward guidance on home fixtures and water hardware. Our writers and product specialists focus on materials, installation, and care to help you choose confidently. We enjoy making complex decisions feel simple and supportive. Thank you for reading and spending a few moments with Allfixture.
Learn more
Sinks Essentials: A Practical Guide to the Right Style
Updated on: 2025-12-02 Choosing the right fixtures for your kitchen or bathroom can feel overwhelming, but it does not have to be. This guide gently walks through materials, styles, installation tips, and care so you can feel confident about your decision. You will find practical comparisons, easy measurements, and accessory suggestions to elevate everyday use. Whether upgrading a cozy vanity or a busy family kitchen, you will discover thoughtful ways to select and care for high-quality sinks that suit your space and lifestyle. Introduction Key Benefits Choosing the Best Sinks for Your Space Step-by-Step Guide Measure Your Space Select the Right Material Decide on Mount Style Plan Features and Accessories Confirm Plumbing and Installation Care Tips for the Long Run FAQ Section What size basin is best for a small kitchen? Is stainless steel better than ceramic? How often should I clean the drain and strainer? Summary & Final Thoughts About the Author Introduction Water fixtures are among the most used features in a home. A well-chosen kitchen or bath basin elevates daily routines, supports hygiene, and expresses your style. With many materials, shapes, and mount types available, it may help to focus on how you use the space day to day. Do you meal-prep often? Do you need a deep bowl for large pots? Are you designing for accessibility or for a compact powder room? This guide offers gentle, practical advice to make confident choices, including dimensions, materials, and maintenance tips. To round out your project, you may also enjoy exploring complementary pieces like kitchen faucets, bathroom faucets, and coordinated shower sets. Key Benefits Everyday comfort: The right bowl depth and shape can reduce splash, ease dishwashing, and support food prep or skincare routines. Durability and longevity: Quality materials—such as stainless steel, fireclay, granite composite, and ceramic—resist chips, stains, and heat. Cleaner, healthier spaces: Smooth, nonporous surfaces and well-fitted strainers make routine cleaning simple and more hygienic. Better workflow: Dual-bowl configurations and fitted accessories help separate tasks and keep counters organized. Style cohesion: Finish and silhouette can echo nearby hardware and lighting for a unified look. Resale appeal: A tasteful, well-maintained basin is a subtle upgrade that prospective buyers appreciate. Choosing the Best Sinks for Your Space Start by matching the fixture to the room’s demands. A high-activity kitchen benefits from a sturdy workhorse, while a guest bath may lean toward a refined, compact bowl. Material is a meaningful choice: stainless steel is resilient and forgiving; fireclay offers classic charm and strong resistance to stains; ceramic provides a bright, smooth surface suited to vanities; granite composite lends a quiet, matte look that hides wear and dampens noise. Each option has its own cleaning profile and aesthetic, so it may help to think about both your habits and the mood you want to create. Mounting style affects installation and maintenance. Top-mount (drop-in) options are flexible and budget-friendly. Undermount bowls create a clean edge for easy counter wipe-downs. Apron-front (farmhouse) designs add a bold, traditional face and generous capacity. Pedestal and wall-mounted basins can open up floor space in small baths. Vessel bowls provide a sculptural effect on vanities and pair well with taller spouts. Think through function. Single-bowl layouts offer wide, uninterrupted space for trays and stockpots. Dual-bowl formats help separate washing and rinsing or prep and clean-up. Depth matters too: deeper bowls contain splash but require slightly more bend at the waist; shallower bowls reduce reach and can be easier on back and shoulders. Consider sound-dampening pads and thicker gauges when quiet operation is important. Finally, choose accessories that make life easier, such as bottom grids, colanders, cutting boards, soap dispensers, and well-fitting strainers. If you prefer a statement piece, a graceful option like an antique brass pull-down faucet can beautifully complement the basin and add functional reach. Step-by-Step Guide Measure Your Space Begin with cabinet width, countertop depth, and available clearance to walls, appliances, or mirrors. Note the cutout size if you are replacing an existing fixture. In bathrooms, measure vanity width and consider usable counter area. In kitchens, check pot and sheet-pan sizes to ensure the bowl accommodates your largest items. Record plumbing locations and any obstacles like drawers or structural braces. Select the Right Material Match material to your routine. Stainless steel is versatile, lightweight, and heat-tolerant. Fireclay brings a timeless look with robust glaze protection. Ceramic works well for vanities due to its glossy, easy-clean surface. Granite composite is sturdy and quiet, with a soft-matte finish that resists marks. Think about cleaning frequency, tolerance for patina, and surrounding finishes before choosing. Decide on Mount Style Top-mount is often the simplest path for replacements and works with many counters. Undermount offers a seamless edge and is popular with stone surfaces. Apron-front adds capacity and a traditional focal point. For small baths, pedestal and wall-mounted choices save floor area. Vessel bowls offer a boutique feel and pair well with tall or wall-mounted spouts. Plan Features and Accessories Consider bowl configuration, depth, and useful add-ons. Bottom grids protect the surface and keep airflow under dishes. Colanders, cutting boards, and roll-up racks turn the rim into a flexible prep station. Choose a coordinated spout with adequate reach and height for your vessel. You may also enjoy browsing best-selling upgrades for practical inspiration. Confirm Plumbing and Installation Check drain size, number of holes, and spacing. Ensure your chosen spout, sprayer, and accessories align with those openings. If you are updating more elements in the bath or kitchen, planning a matched set of bathroom faucets and kitchen faucets can simplify installation and create a cohesive look. When in doubt, a professional installer can help verify compatibility. Care Tips for the Long Run Daily care can be simple. Rinse after use, wipe with a soft cloth, and keep a fitted strainer in place to catch debris. Avoid harsh abrasives; instead, use mild soap and non-scratch pads. For stainless steel, wipe along the grain; for ceramic and fireclay, use gentle cleaners to preserve gloss; for granite composite, use a soft brush and mild detergent. Periodically check caulk lines and mounting clips. FAQ Section What size basin is best for a small kitchen? A compact single-bowl between 22–25 inches wide often suits small kitchens, especially when counter depth is limited. A depth of 8–9 inches can balance splash control with comfortable reach. Consider rounded corners to simplify cleaning, and choose accessories like roll-up racks that store neatly. Is stainless steel better than ceramic? Both are excellent for different reasons. Stainless steel is tough, heat-friendly, and relatively light, making it a popular kitchen choice. Ceramic provides a glossy, classic finish that pairs well with vanities and powder rooms. Your decision may come down to aesthetics, noise level, and how you prefer to clean. How often should I clean the drain and strainer? A quick daily rinse helps, with a more thorough clean weekly or as needed. Remove food particles, hair, and soap residue, then wash the strainer with mild detergent. If odors develop, a gentle flush with warm water and a small amount of mild soap usually refreshes the area. Summary & Final Thoughts With a few careful measurements, a thoughtful material choice, and well-chosen accessories, your water fixture can blend comfort, durability, and style. It may help to choose coordinated hardware and a spout that suits your bowl depth and reach. If you are refreshing multiple zones, exploring curated collections of shower sets and matching taps can create a calm, cohesive home. When you are ready for ideas, you might enjoy browsing kitchen faucets for a polished finishing touch. About the Author Allfixture shares practical, design-forward guidance to help you choose fixtures that feel right for your home. We focus on materials, compatibility, and real-life use so you can shop with ease. If you found this helpful, we hope it supports a smooth, satisfying upgrade.
Learn more
Sinks That Elevate Kitchen and Bath Design A Quick Guide
Updated on: 2025-12-01 This gentle guide walks you through choosing the right basin for your kitchen or bath, including planning, materials, installation types, and care. It explains common trade-offs and offers easy tips to avoid hassles. You will also find a concise comparison of styles and materials, plus practical answers to frequent questions. Whether you are refreshing a vanity or remodeling a chef’s space, you can select kitchen and bathroom sinks with calm confidence. Table of Contents Introduction Common Challenges When Selecting the Right Option Accurate Measurements Choosing Materials Installation Types Care and Maintenance Comparison Section Top-mount vs Undermount Stainless Steel vs Fireclay vs Composite Granite Single-Bowl vs Double-Bowl Summary & Recommendations Q&A Section How do I measure for a new basin? Which material is most durable for daily use? How can I reduce noise and prevent scratches? About the Author Section Introduction Choosing a new basin is a thoughtful way to refresh how a kitchen or bathroom feels and functions. The right choice supports cleaner prep work, smoother cleanup, and a more comfortable daily routine. This article offers a simple framework: measure carefully, match materials to habits, select an installation type that fits your countertop, and plan for long-term care. You will also find a clear comparison of popular styles and materials, so it is easier to see what suits your space. If you plan to coordinate water fixtures at the same time, you may find it helpful to browse complementary pieces like kitchen faucets to create a cohesive look and feel. Common Challenges When Selecting Sinks Accurate Measurements Size is the first and most common stumbling block. Countertop cutouts, cabinet widths, and nearby obstacles can limit what will fit. To reduce surprises, measure the cabinet interior, the depth from the front edge to the wall, and the available width between side panels. Leave space for clips or mounting rails and for a faucet deck if needed. If a disposal or water filter lives under the counter, verify the height and clearance there as well. A simple cardboard template can help you test how a new basin will sit before you commit. Choosing Materials Every material offers benefits and trade-offs. Stainless steel is light, resilient, and easy to clean, while fireclay delivers classic charm and a glossy finish. Composite granite is sturdy and resists chips, and cast iron offers a heavy, traditional presence. It may help to match the basin’s resilience to your routine. For example, daily pot-and-pan work calls for something forgiving, while a powder room vanity benefits from a finish that is simple to wipe. Coordinating the finish with nearby fixtures—such as pairing a brushed basin style with complementary bathroom faucets—gives a balanced result. Installation Types Mounting style shapes the look and the maintenance. Top-mount (drop-in) units rest on the counter and are usually straightforward for DIY-friendly updates. Undermount styles fasten below the counter for a seamless edge that is easy to wipe, but they require a sturdy surface and careful support. Apron-front (farmhouse) designs showcase a visible front panel that brings character and extra bowl depth. If you are refreshing the shower or tub area at the same time, reviewing complementary shower sets can help create a harmonized, spa-like space. Care and Maintenance Simple habits keep a basin looking its best. Wipe it dry after heavy use to discourage water spots, use a gentle non-abrasive cleaner, and place a grid or mat on the bottom to protect the surface. Avoid harsh scouring pads on glossy finishes and do not leave acidic or salty water to sit. A little routine care goes a long way, and most materials reward consistency more than intensity. Comparison Section Top-mount vs Undermount Both styles have a place; the right choice depends on your countertop and comfort with maintenance. Pros of top-mount: Easier install for retrofits and laminate countertops. Generally lower install cost and fewer support requirements. Edge lip can help contain splashes. Cons of top-mount: Countertop seam at the lip may collect debris. Visible rim can break the visual flow on stone surfaces. Pros of undermount: Sleek look with a flush counter edge that wipes clean. Maximizes usable counter space around the bowl. Cons of undermount: Requires solid counters (stone, quartz, or similar) and secure mounting. Professional installation is often preferred. Stainless Steel vs Fireclay vs Composite Granite Each material balances durability, appearance, and care. Stainless steel: Lightweight, resilient, and budget-friendly across many gauges. Brushed finishes hide use marks better than mirror-polish. May show water spots without regular drying. Fireclay: Classic, high-gloss finish with timeless appeal. Resists stains well and offers a smooth surface. Heavier and may require extra cabinet support. Composite granite: Matte, modern look that resists chips and heat. Solid feel that helps dampen noise. Requires gentle cleaners to preserve finish. Single-Bowl vs Double-Bowl Configuration affects workflow more than you might expect. Single-bowl benefits: Room for large cookware and oven trays. Simpler to clean with fewer corners and seams. Single-bowl considerations: Soaking and rinsing need planning without a second compartment. Double-bowl benefits: Separate zones for prep and cleanup or for handwashing delicate items. Flexible use with optional colanders or racks. Double-bowl considerations: Each compartment is smaller; large pots may feel tight. Summary & Recommendations Thoughtful planning leads to a basin that looks beautiful and works the way you prefer. Start with precise measurements, then select a material that matches your routine—resilient steel for busy cooking, glossy fireclay for traditional charm, or composite granite for a modern matte look. Choose a mounting style that suits your countertop and comfort with installation. If you are upgrading sinks in a busy kitchen, consider a deep single-bowl for large cookware and a protective grid for everyday care. For inspiration and coordinated fixtures, you might enjoy browsing Allfixture’s best sellers to see popular combinations. Q&A Section How do I measure for a new basin? Measure the cabinet width inside the doors to confirm the maximum overall size. Then check the countertop depth from the front edge to the backsplash, allowing for faucet clearance. Note the existing cutout (if any) and leave space for mounting hardware. Finally, confirm the under-cabinet height if you use a disposal or water filter. A cardboard template helps you see edge-to-edge coverage and reveals any tight corners before ordering. Which material is most durable for daily use? Durability depends on the type of use. For frequent cooking with heavy pots, a well-made stainless unit in a thicker gauge (lower number) is a forgiving choice. Composite granite is also sturdy and resists chips, while fireclay provides a smooth, classic look that handles heat well. If your space is more decorative, focus on finish quality and ease of cleaning. Matching the basin to your habits is the surest path to long-term satisfaction. How can I reduce noise and prevent scratches? Look for sound-dampening pads or undercoating on metal models, and consider a fitted bottom grid to protect the surface. Use soft sponges with non-abrasive cleaners, and rinse away gritty debris after prep. Drying at the end of the day helps minimize water spots on metal or glossy finishes. Thoughtful accessories, such as a gentle rack or silicone mat, offer protection without complicating daily cleanup. About the Author Section Jordan Lee, Home Fixture Specialist Jordan Lee is a content strategist with a focus on kitchen and bath design, collaborating with Allfixture to create helpful buying guides for homeowners and renovators. Jordan’s work blends practical planning with real-world maintenance tips, from basins to bathroom faucets and kitchen faucets. When not writing, Jordan enjoys testing ergonomic layouts and thoughtful accessories that make daily routines smoother. Thank you for reading, and we hope your next update feels simple and satisfying.
Learn more
Bathtubs Buying Guide for Comfort Style and Value Essentials
Updated on: 2025-11-28 This gentle guide to bathtubs explains styles, materials, and space planning so you can choose with confidence. You will learn how to measure your bathroom, compare freestanding and alcove designs, and see which options suit compact rooms. We also cover acrylic tubs and jet features, essential installation considerations, and easy maintenance habits. Helpful tips and links are included to support a smooth, low-stress upgrade. Table of Contents Why Bathtubs Transform Everyday Routines Did You Know? Bathtubs Facts That May Surprise You Expert Tips for Selecting and Installing Bathtubs How do I measure for a new bathtub to ensure it fits? What are the most common materials for bathtubs? Drain, faucet, and shower compatibility with bathtubs Freestanding Bathtub vs. Alcove Bathtub: Choosing What Fits Best Bathtubs for Small Bathrooms: Space-Savvy Ideas Acrylic Bathtubs and Jet Options: What to Consider Personal Anecdote: Finding the Right Bathtub Summary & Takeaways on Bathtubs Bathtubs Q&A: Your Top Questions Answered About the Author: Allfixture Why Bathtubs Transform Everyday Routines Bathtubs can gently elevate daily life by creating a calm, restorative corner in your home. Whether you prefer a quick soak after a long day or you enjoy unhurried weekend rituals, the right bathtubs make comfort feel effortless. From compact alcove models to elegant freestanding designs, there is a bathtub (or bath-tub, if you prefer the classic hyphen) for almost every layout. This guide walks through measurements, materials, styles, and small-space strategies so your choice feels considerate and well-informed. Did You Know? Bathtubs Facts That May Surprise You Many modern acrylic bathtub shells are reinforced with fiberglass, striking a helpful balance between weight and durability. A freestanding bathtub often becomes the visual centerpiece of a bathroom, yet some models are sized to fit in compact spaces. Some acrylic bathtubs with built-in jets include quiet pump systems and adjustable jet positions for a gentler soak. Alcove tubs are considered among the best bathtubs for small bathrooms because they maximize wall-to-wall space. Simple maintenance—like rinsing after each use—can help keep both acrylic and enamel finishes looking fresh for years. Expert Tips for Selecting and Installing Bathtubs How do I measure for a new bathtub to ensure it fits? Measuring carefully can help you avoid surprises and keep delivery and installation smooth: Check the path in and out: Measure doorways, hallways, stair turns, and clearances from entry to bathroom. Compare these to the packaged tub dimensions, not just the out-of-box size. Confirm the alcove or footprint: For an alcove, measure back wall length (stud to stud), depth (front to back), and height of walls. For a freestanding tub, note the floor area and leave comfortable space around the bath-tub for cleaning and access. Locate plumbing: Record the center of the drain and supply lines. Right, left, or center-drain orientation must match your new bathtub. Mind weight and floor support: Tubs filled with water plus a person can be heavy. When in doubt, ask a professional to verify floor structure and subfloor integrity. Mock the footprint: Use painter’s tape on the floor to outline the tub. Stand, bend, and simulate use to check elbow room and movement. What are the most common materials for bathtubs? Several materials offer different balances of weight, warmth, and upkeep: Acrylic: Lightweight, warm to the touch, and widely available. It is a popular choice for modern shapes and is easy to clean with non-abrasive products. Fiberglass (FRP): Budget-friendly and light. It may show wear sooner than acrylic, yet suits guest baths or low-traffic spaces. Enamel-coated steel: Durable and relatively affordable. The surface is hard; using a bath mat or gentle handling helps prevent chips. Cast iron: Extremely long-lasting with a classic look. It is heavy, so delivery and floor support require careful planning. Solid surface/stone resin: Premium, sleek, and usually heavier than acrylic. It retains heat well and offers a refined appearance. Drain, faucet, and shower compatibility with bathtubs Before finalizing your tub, confirm that the drain location aligns with your plumbing, and choose a compatible filler and overflow. For alcove tubs that double as a shower, a quality set of fixtures can support reliable performance. If you are refreshing fixtures at the same time, you may find it helpful to explore bathroom faucets for tub fillers and spouts, and consider shower sets if you plan a combined shower-bath layout. Freestanding Bathtub vs. Alcove Bathtub: Choosing What Fits Both freestanding and alcove bathtubs have thoughtful advantages, and the right choice depends on your layout and goals. Freestanding bathtub: This style sits independently from walls and can provide a spa-like focal point. It is often easier to position visually and can be moved slightly to accommodate plumbing. Keep in mind the space needed around the tub for cleaning, and be sure there is a plan for the tub filler—floor-mounted or wall-mounted fixtures work well. Lightweight acrylic versions make freestanding designs more feasible in upstairs bathrooms. Alcove bathtub: Installed between three walls, the alcove option is efficient and typically integrates a shower. It is a top contender among the best bathtubs for small bathrooms because it uses wall-to-wall space with minimal footprint. The apron front simplifies installation and can reduce finishing costs. If you enjoy long soaks and have a bit of floor space to spare, a freestanding tub adds a relaxing feeling. If your priority is everyday practicality, an alcove bath with a shower may feel gently streamlined. Best Bathtubs for Small Bathrooms: Space-Savvy Ideas Small bathrooms can feel serene with the right planning. Consider these solutions: Shorter length, deeper soak: Compact tubs around 54–60 inches can be deeper to maintain a comfortable bathing experience while saving floor space. Corner tubs: In some layouts, a triangular or corner model opens walking space, though you will want to verify that the interior still feels supportive and ergonomic. Skirted alcove tubs: A simple apron front speeds up installation and can help reduce finishing complexity in tight rooms. Clean lines and lighter finishes: A smooth, light-colored acrylic bathtub can make smaller rooms feel brighter and more open. Shower-bath combo: A straightforward shower over an alcove tub supports everyday flexibility. For fixture inspiration, you might browse updated best-selling options that complement a compact layout. Acrylic Bathtubs and Jet Options: What to Consider Acrylic remains one of the most approachable materials for residential bathtubs. It is relatively light, easy to clean, and available in many shapes. If you are considering acrylic bathtubs with built-in jets, a few points may be helpful: Jet type: Air systems offer a gentle, bubbly sensation, while water jets provide a more directed massage. Choose the feel you prefer. Sound and access: Modern systems are designed for quiet operation. Ensure the pump and controls are accessible for service, usually via a removable panel. Electrical and GFCI: Jetted tubs require dedicated electrical considerations. A licensed pro can help you meet local requirements. Cleaning routines: Many systems benefit from periodic internal cleaning cycles. Following the manufacturer’s steps helps maintain fresh, hygienic lines. Weight and floor: Jetted models may weigh more due to pumps and hardware. Verifying floor support protects your investment. If you like the idea of a gentle spa effect with modest maintenance, air systems in an acrylic bath can be a courteous middle ground between simplicity and luxury. Personal Anecdote: Finding the Right Bathtub I once helped a friend who was torn between an elegant freestanding tub and a practical alcove model. The room was cozy, and the walkway needed to stay clear. We taped outlines on the floor, opened the door fully, and tested where towels and storage would go. It became clear a skirted alcove tub would keep the routine smooth and the space tidy, without feeling cramped. After installation, the room felt brighter, movement was easy, and the choice felt reassuringly correct. Summary & Takeaways on Bathtubs Start with measurements and access paths, then match the drain location and tub size to your room. Choose materials thoughtfully: acrylic for lightness and warmth, enamel or cast iron for classic durability, or solid surface for a sleek, premium feel. Pick a layout that aligns with your routine—freestanding for a focal point or alcove for everyday efficiency. In compact rooms, prioritize footprint, depth, and fixture simplicity; alcove tubs often provide the best fit. If you prefer jets, confirm access, electrical needs, and cleaning routines to keep things running smoothly. When updating fixtures alongside your tub, consider curated buying guides to compare styles and finishes with calm clarity. Bathtubs Q&A: Your Top Questions Answered Are acrylic bathtubs durable enough for everyday use? Yes, acrylic bathtubs are commonly reinforced and designed for frequent use. They resist typical household wear when cleaned with non-abrasive products. For families, acrylic offers a considerate blend of warmth, resilience, and approachable pricing. Can a freestanding bathtub work with a shower? It is possible, though it requires careful planning. Most households prefer showers over alcove tubs because walls contain water and support a curtain or glass panel. If you want a freestanding tub with a shower, discuss splash containment, curtain rings, and fixture placement with an installer. Otherwise, consider pairing a freestanding tub with a separate shower to keep routines simple and comfortable. How much room around a bathtub do I need for comfortable access? A comfortable guideline is to leave open space on the approach side for stepping in and out, plus enough elbow room for cleaning. For freestanding models, additional clearance around the sides and end helps with maintenance. Tape an outline on the floor and try daily movements to confirm comfort before ordering. About the Author: Allfixture Allfixture Allfixture shares thoughtful guidance on bath and kitchen fixtures so you can choose with ease. With experience across materials, finishes, and installation details, Allfixture focuses on clarity and comfort-first design. Thank you for reading—wishing you a calm and confident bathtub upgrade.
Learn more