Buying Guides

Rainfall Shower Head Guide for a Spa Like Shower at Home
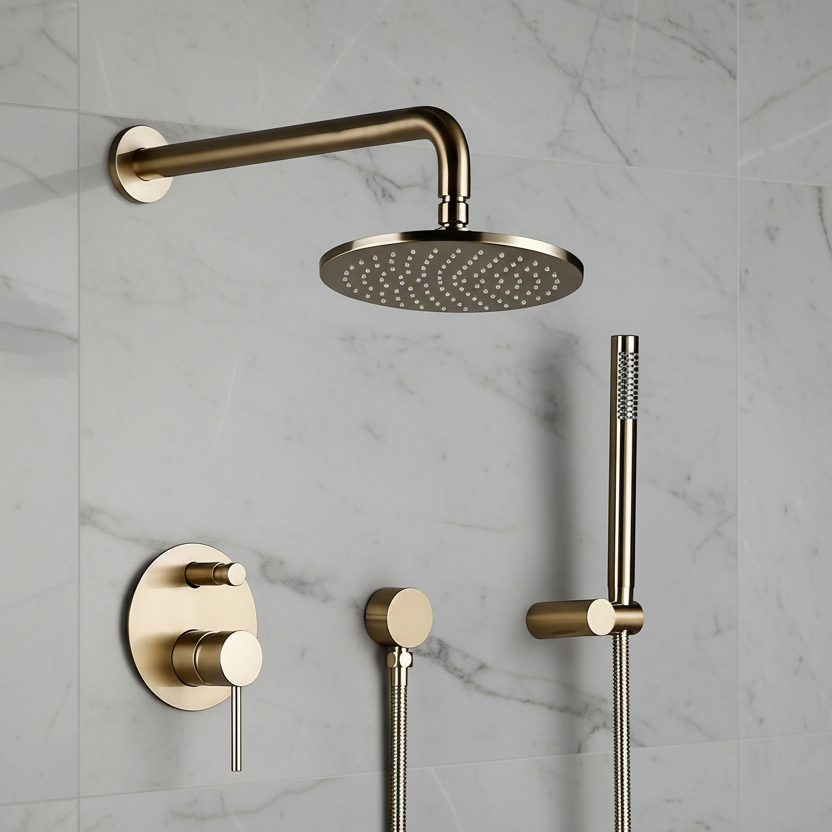
Updated on: 2025-12-20 Thinking about upgrading your shower for a calm, spa-like feel? This guide walks you through selecting, installing, and caring for an overhead rain-style fixture with confidence. You will find practical tips on size, materials, water flow, and maintenance, plus a gentle step-by-step plan for a smooth setup. We also address common questions about pressure, compatibility, and durability so you can make a careful, informed choice. When you are ready, you can explore curated options to match your style and budget. How-To Steps Choosing the Right Rainfall Shower Head FAQ Will an overhead rain shower work with low water pressure? How large should the shower plate be for a small bathroom? Which materials last longer and stay looking new? Closing Thoughts About the Author If you enjoy a gentle, full-coverage shower, a rainfall shower head can bring a serene, spa-like experience to your daily routine. The broad spray pattern is designed to fall softly from above, wrapping you in an even, soothing stream. In this guide, you will learn how to plan the upgrade, understand key specifications, and maintain your setup so it keeps performing beautifully. How-To Steps Below is a straightforward, friendly process for planning and setting up a tranquil overhead rain shower. Please consider safety and manufacturer guidance at every step. 1. Define your goal and budget. Decide whether you prefer a ceiling-mounted design for a true “rain from above” feel or a wall-mounted arm for simpler installation. Outline your budget to guide material choices and any needed plumbing work. 2. Measure water pressure and flow. Check your home’s water pressure with a simple gauge or ask a professional to confirm. Many wide spray plates feel best at moderate to higher pressure; if your pressure is low, look for heads designed to concentrate flow or models with air-infusion technology. 3. Choose ceiling or wall mounting. Ceiling mounting positions the spray directly overhead and often gives the most immersive feel. Wall mounting can be easier to install and maintain, especially if your plumbing is already in place. 4. Select the spray plate size. Typical diameters range from about 8 inches to 12 inches or more. Larger plates offer broader coverage, while smaller sizes are easier to fit in compact spaces and often work better with modest pressure. 5. Pick durable materials and finish. Solid brass and stainless steel are known for longevity, with finishes such as brushed nickel, matte black, or vintage brass to match your décor. Consider the rest of your bath hardware for a coordinated look. 6. Confirm valve and arm compatibility. Ensure your existing mixing valve and shower arm can support the weight and connection type of the new head. If you plan a full refresh, consider a matched set for seamless function and style. You may find it helpful to browse Shop shower sets to see coordinated options. 7. Install carefully or consult a pro. Turn off water supply, protect surfaces, and follow the manufacturer’s instructions. Use thread seal tape on connections, tighten gently, and confirm there are no leaks. If anything feels uncertain, a licensed professional can help ensure a clean, safe result. 8. Test and fine-tune. Turn on the water and check the spray pattern. Adjust the arm angle if applicable, and verify the flow is even. Make small tweaks to achieve a balanced, comfortable shower experience. 9. Maintain with simple care. Wipe the spray face after use to reduce mineral buildup. If limescale forms, gently rub silicone nozzles to clear deposits. Periodic cleaning helps preserve water flow and finish. Choosing the Right Rainfall Shower Head Finding the right model is a balance of comfort, performance, and style. The points below can help you narrow choices without feeling overwhelmed. Spray coverage and comfort. Wider plates create a calm, enveloping stream that many people find relaxing. If you prefer a more focused feel, consider a mid-size plate or a model with multiple spray options. Flow rate and pressure. Pay attention to the gallon-per-minute rating and any pressure-boosting design features. If your pressure runs low, look for concentrated nozzle patterns or air-mixing technology that helps maintain a satisfying spray with less water. Materials and finishes. Solid brass offers weight and durability; stainless steel is corrosion-resistant and sleek. Choose a finish that complements your décor and other fixtures. For instance, pairing with matching trim or handles can create a cohesive look across the space. If you plan a complete update, a coordinated set like the Solid brass shower set may simplify decisions and installation. Mounting style. Ceiling-mounted designs place spray directly overhead for a true rain effect, while wall-mounted arms provide easier accessibility and often simpler maintenance. Consider ceiling height, enclosure size, and whether you like an adjustable arm. Ease of cleaning. Silicone nozzles that you can rub clean help remove mineral buildup quickly. A smooth, wipeable surface reduces water spots and keeps your fixture looking fresh. Compatibility with existing plumbing. Verify thread size, arm strength, and valve function. A lightweight fixture is easier on older arms, and a sturdy arm is best for heavier metal plates. Water efficiency. Look for models that balance comfort with conservation. Efficient spray engineering can deliver a satisfying feel while supporting responsible water use. Design harmony. Try to align the new head with other bathroom accents such as the faucet or hand shower. For complementary pieces, you might explore coordinated Bathroom faucets or browse Best-selling picks for inspiration. A thoughtful selection process reduces guesswork and helps your upgrade feel cohesive and dependable for years to come. If you are torn between sizes, consider the distance from the spray plate to your shoulders during use; a plate that sits too high in a very tall ceiling may feel lighter than expected, while a plate too close may concentrate the stream more than you prefer. FAQ Will an overhead rain shower work with low water pressure? It can, depending on the model and setup. If your pressure is modest, consider a smaller plate or a design that focuses flow through fewer nozzles. Air-infusion technology may help the spray feel fuller without using more water. Whenever possible, test comparable fixtures or consult a professional to gauge how the spray will feel in your home. How large should the shower plate be for a small bathroom? Many compact spaces feel comfortable with an 8–10 inch plate. This size tends to deliver an even stream without overwhelming the enclosure or requiring very high pressure. Placement also matters: keeping the spray centered helps avoid splashing that can occur in tighter layouts. Which materials last longer and stay looking new? Solid brass and stainless steel are both reliable choices. Solid brass provides weight and a premium feel; stainless steel resists corrosion and offers a modern look. Whichever you choose, consistent gentle cleaning and drying after use can keep finishes clear and reduce mineral spotting over time. Closing Thoughts A calm, even spray can turn a routine rinse into a simple daily luxury. With a careful plan, the right dimensions, and a durable finish, a rainfall shower head can offer comfort and style without complication. If you are considering a coordinated update, you may enjoy exploring curated options in Shop shower sets. When you feel ready, a gentle, step-by-step approach will help your new setup feel welcoming from the first turn of the handle. About the Author Written by the Allfixture content team, specialists in bathroom and kitchen fixture guidance. We focus on clear, practical advice so you can choose with confidence and ease. For ideas that pair beautifully with your shower, consider our curated Bathroom faucets. Thank you for reading, and we hope your next refresh feels simple and satisfying. New to shower systems? Start with our complete buyer's guide: How to Choose a Complete Shower System.
Learn more
Dual Handle Faucet Buying Guide for Smart Kitchen Upgrades
Updated on: 2025-12-18 If you value precise temperature control, classic style options, and simple maintenance, a dual handle faucet can be a thoughtful upgrade for your sink. This guide explains how to choose, install, and care for a two-handle tap with confidence. You will find myths clarified, practical steps outlined, and concise answers to common questions. The aim is to help you make a calm, informed decision that suits your space and routine. 1. Introduction Paragraph 2. Myths vs. Facts (dual handle faucet) 3. Tools You May Need 4. Step-by-Step Guide 5. Frequently Asked Questions 6. Are two-lever taps water-efficient? 7. What sink configurations fit a two-handle setup? 8. How long does installation usually take? 9. Summary & Key Takeaways 10. Q&A Section 11. Can I switch from a single to a two-handle without new holes? 12. What finishes resist fingerprints best? 13. How do I keep water lines balanced over time? 14. About the Author Section 15. Author Bio Introduction Paragraph Choosing a sink fixture can feel more complex than it appears. Between styles, valve types, hole spacing, and finishes, it helps to have a clear path. Many homeowners prefer the familiar feel of separate hot and cold handles, especially when precise control and classic lines matter. If you are considering a dual handle faucet for your kitchen or bath, this guide walks through key decisions, gentle installation steps, and straightforward maintenance tips. As you explore options, it may be helpful to compare categories such as bathroom faucets and kitchen faucets. Understanding the sink configuration, finish durability, and valve quality will support a smooth experience from purchase to daily use. Myths vs. Facts (dual handle faucet) Myth: Two-handle taps always waste more water. Fact: Water use depends on the aerator, flow rate, and your habits. Models with WaterSense-style flow rates and quality aerators can be as efficient as single-handle designs. Myth: They are hard to install. Fact: With the right tools and a patient approach, installation is manageable for many DIYers. The process is methodical: shut off water, position the trim, secure the nuts, and connect supply lines. Myth: Two handles feel outdated. Fact: Today’s two-lever faucets come in modern silhouettes, slim profiles, and premium finishes that suit contemporary, transitional, and classic spaces alike. Myth: Temperature adjustments take longer. Fact: Separate hot and cold controls allow quick fine-tuning, which many users find intuitive after a short period of use. Myth: More parts mean more leaks. Fact: Reliability mainly depends on valve quality and proper installation. Ceramic-disc cartridges and solid brass bodies are known for durability. Myth: They never fit small sinks. Fact: Centerset two-handle models fit 4-inch three-hole sinks, while widespread sets fit 8-inch (or adjustable) spreads, making them suitable for compact and larger basins. Tools You May Need Adjustable wrench, basin wrench, plumber’s tape, non-staining plumber’s putty or silicone, bucket or towel, and mild cleaner for final wipe-down. Step-by-Step Guide 1. Confirm sink configuration: Count holes and measure the spread (e.g., 4-inch centerset or 8-inch widespread). This ensures your selected two-handle mixer fits without extra drilling. 2. Turn off water: Close the shut-off valves under the sink. Open the existing tap to release pressure and place a towel or bucket underneath. 3. Remove the old fixture: Disconnect supply lines, loosen mounting nuts with a basin wrench, and lift out the old assembly. Clean the deck to remove old putty. 4. Dry-fit the components: Position the spout and handles to verify alignment and handle clearance. This quick check prevents rework later. 5. Seal and seat: Apply a thin bead of non-staining plumber’s putty or silicone (as the manufacturer recommends), then set the trim. Hand-tighten mounting hardware to keep parts aligned. 6. Connect supply lines: Attach hot and cold lines to the correct inlets. Use plumber’s tape on threaded connections if needed, and tighten gently to avoid overtightening. 7. Install the drain (if included): Place the flange with sealant, align the tailpiece, and secure the pivot rod and stopper. Check that the stopper moves smoothly. 8. Restore water and test: Slowly open shut-off valves. Let the water run to flush debris, and check every joint for moisture. Tighten connections if a drip appears. 9. Final alignment and clean-up: Center the handles, confirm smooth operation, and wipe away sealant residue for a neat, finished look. Frequently Asked Questions Are two-lever taps water-efficient? They can be. Look for low-flow aerators and ceramic-disc valves. Good habits, like turning off the water between tasks, will also help you keep consumption in check. What sink configurations fit a two-handle setup? Most models fit either 4-inch three-hole (centerset) or 8-inch widespread layouts. Some widespread designs offer adjustable spacing, which is helpful when retrofitting older sinks. How long does installation usually take? For a straightforward replacement, many homeowners complete the job in about an afternoon. Allow extra time if you are adding a matching drain, replacing shut-off valves, or cleaning stubborn buildup. Summary & Key Takeaways Two-handle fixtures offer fine temperature control, familiar ergonomics, and a broad range of styles. With a simple checklist—match your sink holes, choose durable valves, and seal carefully—you can enjoy reliable performance and a polished look. If you would like additional inspiration before choosing, you might browse Allfixture’s buying guides or explore popular picks across best-selling fixtures. We hope these tips support a calm, confident upgrade that fits your routine and your space. Q&A Section Can I switch from a single to a two-handle without new holes? It depends on your sink or countertop. If you have a single-hole sink, you would typically need new holes or a deck plate with compatible side valves. If you already have three holes, a centerset two-handle set often drops in smoothly. What finishes resist fingerprints best? Brushed and matte finishes tend to hide smudges better than polished surfaces. PVD-coated options offer strong wear resistance and help maintain a consistent appearance with minimal effort. How do I keep water lines balanced over time? Periodically clean aerators and check shut-off valves for partial closures. If flow seems uneven, flushing the lines and ensuring both cartridges operate freely usually restores balance. About the Author Section Author Bio Written by the Allfixture Editorial Team, specializing in faucets, shower systems, and home water hardware. We focus on practical, design-forward guidance that makes upgrading feel approachable. Thank you for reading—wishing you an easy, satisfying refresh.
Learn more
Wall Mounted Faucet Ideas for a Sleek Modern Bath Upgrade
TL;DR: Thinking about a wall mounted faucet? It saves counter space, simplifies cleaning, and offers a sleek, timeless look. The key is careful planning: confirm your sink height, spout reach, and rough-in location before installation. With thoughtful selection and gentle maintenance, you can enjoy reliable performance and refined style for years. This guide walks through benefits, step-by-step installation, and practical answers to common questions. Updated: Updated on: 2025-12-17 Benefits of wall-mounted tapware How to install a wall mounted faucet Plan your layout Check sink and splash zone Rough-in the plumbing Mount and seal the trim Test and maintain Questions and answers What height is best? Can I reuse existing plumbing? How do I reduce splashing? Summary About the author Choosing a wall mounted faucet is a thoughtful way to free up counter space and create a clean, modern silhouette in a bathroom or kitchen. Because the valve and spout live on the wall, you gain room around the sink, reduce clutter, and make daily wipe-downs easier. The design also pairs beautifully with vessel bowls and deep basins, offering a tailored look that feels both polished and practical. In this guide, you will find clear benefits, a gentle step-by-step walkthrough for installation, and straightforward answers to common questions so you can plan with confidence and care. Benefits of wall-mounted tapware More counter space: With no deck holes to cut, surfaces stay open for soap, decor, or simply an uncluttered look, which can make small rooms feel larger. Cleaner edges: Lifting the hardware off the deck removes hard-to-reach seams, so daily cleaning is quick and gentle with fewer crevices for grime. Flexible pairing: Wall-fixed spouts work beautifully with vessel sinks and trough basins, letting you choose the ideal bowl shape and height. Refined style: The long, graceful reach of wall-mount tapware adds a minimalist line on the wall, blending with modern, transitional, or classic interiors. Ergonomic comfort: When planned well, the spout projects to the natural working area of the sink, helping reduce awkward wrist angles. Long-term value: The concealed valve keeps the look tidy, and many designs offer serviceable cartridges, supporting reliable performance over time. How to install a wall mounted faucet Step 1: Plan your layout Begin by confirming where the spout and handles should sit relative to the basin. Visualize the centerline of the sink, then map the spout outlet to the bowl’s center for comfortable use. Check the valve body depth recommended by the manufacturer to ensure it fits within your wall cavity. Note the stud locations and think ahead about any blocking that might be needed. Consider how the tapware will relate to your fixtures. For a bath or powder room, review style, finish, and handle type alongside matching bathroom faucets. For culinary spaces, confirm the reach and water flow that fits prep and cleaning tasks, and explore coordinating kitchen faucets for a cohesive look across your home. If you are still exploring aesthetic choices, this short modern faucet guide may be helpful. Step 2: Check sink and splash zone Clearances make a big difference. Measure from the finished countertop or basin rim to the intended spout outlet. A vessel bowl may require a higher centerline than an undermount sink, while a deep basin might tolerate a slightly lower spout without splash. Confirm that the spout projection lands the water stream near the center of the bowl, not too close to the rim and not too far toward the drain. Also consider handle swing. Make sure lever handles can open fully without hitting a mirror, shelf, or backsplash trim. If your design includes a framed mirror or tall backsplash, sketch the layout with real measurements to be sure everything clears. Planning this now prevents awkward adjustments later. Step 3: Rough-in the plumbing Turn off the water supply and carefully open the wall where the valves will sit. Install any needed blocking to support the valve body, keeping it level and at the manufacturer’s depth reference. Align hot and cold supplies to the inlets, using gentle bends and avoiding strain on the fittings. Use plumber’s tape on threaded connections where appropriate, and follow the included instructions for your specific valve kit. Before closing the wall, pressure test the connections to check for leaks. A brief test now can prevent larger repairs later. Allow for access during testing, and only proceed to close the wall after everything is dry. Once you are satisfied, you can patch, smooth, and prepare for your finished wall surface. Step 4: Mount and seal the trim After the wall is finished and painted or tiled, mount the trim plate, spout, and handles. Confirm the gaskets are seated properly and hand-start all threads to avoid cross-threading. Tighten carefully and evenly to keep parts aligned and level. Apply a thin bead of silicone where the escutcheon meets the wall if the instructions call for it, then smooth the edge for a discreet seal. Step back and check sight lines. The spout should sit straight, and handles should share a common level line. If your bathroom also features coordinated fixtures, this is a nice moment to align finishes—brushed, polished, or matte—and consider adding matching shower sets for a harmonious look. Step 5: Test and maintain Turn the water back on slowly. Open the handles to purge air from the lines and let the water run for a short time to flush debris that may have gathered during installation. Inspect all joints for moisture and check that temperature control feels smooth. If the spout includes an aerator, remove and rinse it after the first flush, then reinstall. For ongoing care, use a soft cloth and mild soap for routine cleaning. Avoid harsh pads or aggressive chemicals that can dull the finish. A gentle wipe after use helps reduce mineral spots, while occasional aerator cleaning keeps the flow consistent. With these simple habits, your wall-mount tapware can stay beautiful and dependable. Questions and answers What height should I choose for the spout? It depends on your sink. For an undermount or drop-in basin, many homeowners prefer the water outlet a modest distance above the rim for comfortable handwashing without splash. For a vessel bowl, the spout’s outlet typically sits higher to clear the rim. The best approach is to mock up with painter’s tape and measure from your actual sink setup. Aim for a stream that lands near the center of the bowl and allows hands to pass underneath easily. Can I use existing plumbing lines? Sometimes. If supply lines already run in the wall at a suitable height and location, a professional can evaluate whether they align with your new valve body. In many cases, moving lines a short distance and adding secure blocking for the valve is a straightforward update. If your wall is masonry or very shallow, it may require creative solutions. A brief site check by a licensed pro can clarify what is practical for your space and budget. How can I prevent splashing? Splashing usually comes from a mismatch between spout height, projection, and bowl shape. Choose a projection that drops water into the basin’s working area, not onto the slope near the rim. Keep the outlet at a comfortable height above the rim, and consider an aerator that softens the stream. During testing, try different flow settings and hand positions to see where water lands; small adjustments to height or handle position can make a noticeable difference. Summary A thoughtfully planned wall mounted faucet offers clean lines, easier upkeep, and more usable counter space. Success begins with careful layout: confirm rough-in depth, spout reach, and handle clearance before closing the wall. Test thoroughly, flush the lines, and adopt gentle cleaning habits to protect the finish. With the right choices and a calm, methodical approach, you can enjoy a streamlined sink area that looks refined and works beautifully day after day. About the author Written by the Allfixture editorial team, specialists in faucets, tapware, and bath design. We focus on clear, practical guidance that helps you choose and care for products with confidence. If you found this helpful, we are glad to support your project and wish you a smooth upgrade. Related: Wall-Mount vs Deck-Mount Bathroom Faucets: Which Is Right for You?.
Learn more
Vessel Sink Trends: Elevate Your Bath with Bold Sinks
Updated on: 2025-12-16 Thinking about a vessel sink for a calm, spa-like bathroom? This guide walks you through benefits, sizing, materials, faucet pairing, installation notes, and care so you can plan with confidence. You will also find expert tips, a short personal story, and answers to common questions. Feel free to explore helpful links to curated fixtures that complement your look. Table of Contents A Calm Introduction to Above-Counter Basins Choosing the Right Vessel Sink for Your Bathroom Materials and Finishes Sizing, Placement, and Ergonomics Faucet and Drain Pairing Care, Cleaning, and Longevity Did You Know? Expert Tips Personal Anecdote Summary & Takeaways Q&A Section About the Author A Calm Introduction to Above-Counter Basins A countertop basin can refresh a bathroom with gentle elegance and practical function. Its raised profile adds a sculptural element that feels modern yet timeless, and it often creates a relaxing focal point on the vanity. Because these bowls sit above the counter, they can be easier to install on existing cabinets, and they help express personal style through shapes, heights, and materials. With a little planning, you can enjoy a clutter-free, comfortable setup that looks welcoming and feels easy to maintain. Choosing the Right Vessel Sink for Your Bathroom When selecting this style of wash bowl, it may help to start with your space and routine. Consider who uses the bathroom, how much counter area you need, and the style you prefer. A round bowl often softens tight spaces, while a rectangular silhouette offers a clean, architectural line. If you like a spa-inspired mood, a wide, shallow basin in a calming finish can make the room feel serene. For family use, look for sturdy materials and an easy-to-clean surface. Compatibility with existing cabinetry matters. A standard vanity height may feel tall once the basin is added, so measuring is wise. Many homeowners gently lower the counter to keep comfortable reach. You can also choose a lower-profile bowl to preserve ergonomics without remodeling. Materials and Finishes Material Options Porcelain remains a classic for its smooth look, stain resistance, and approachable price. Tempered glass offers a light, airy presence and reflects brightness in smaller rooms. Natural stone such as marble or granite feels luxurious and unique, but it may require sealing and a bit more attention. Metal basins, like copper or brass, develop character over time and pair well with warm finishes. Finish Coordination Coordinating finishes can gently unify a bathroom. If you favor warm tones, brushed brass or antique brass faucets blend beautifully with stone basins. For a cool, contemporary approach, matte black or polished chrome keeps lines crisp. To carry the look into the shower, you might explore coordinated shower sets that share the same finish family for a cohesive effect. Sizing, Placement, and Ergonomics Bowl Dimensions Most countertop bowls range from about 14 to 20 inches wide. In compact bathrooms, a smaller diameter helps preserve surface space for everyday items. In larger rooms, a wide oval or rectangular option can anchor the vanity and balance a tall mirror. Aim to leave enough counter area on at least one side for soap, a cup, or a neatly folded hand towel. Height and Reach Comfortable height is essential. The combined height of vanity plus basin typically feels best when it allows your wrists to rest naturally at the rim. If you are not changing cabinetry, a low-slung bowl (or a slightly thinner countertop) may help. Also consider splash distance. A centered drain and faucet with a gentle arc can reduce splashing and keep daily use pleasant. Faucet and Drain Pairing Faucet Types Two faucet styles usually pair well: tall single-hole models that sit on the counter, or wall-mounted designs that keep the surface open. The spout height should clear the rim comfortably while avoiding excessive drop that could cause splash. If you are updating fixtures, you may appreciate browsing coordinated bathroom faucets to match finish and style. Drain and Overflow Many bowl-style basins use a grid drain or a pop-up drain without overflow. Be sure the drain assembly is compatible with your basin’s design. If your vanity plumbing includes an overflow requirement, check product specifications so everything aligns. When in doubt, professional installation can provide reassurance, especially when rerouting supply lines or planning wall-mounted fixtures. Creating a Cohesive Fixture Set For a polished look, carry your chosen finish across the room. Matching shower trim and sink hardware can feel calm and intentional. If you enjoy curated picks, consider exploring best sellers that highlight reliable finishes and customer favorites. Care, Cleaning, and Longevity Everyday care can be gentle and quick. A soft cloth, mild soap, and warm water usually handle routine cleaning. Avoid harsh abrasives that may dull shine or scratch surfaces. For stone basins, a pH-neutral cleaner helps preserve the sealant. Wipe water spots as you go to keep the surface bright. For metal bowls, light drying reduces mineral marks and supports an even patina over time. Hardware deserves attention as well. Wipe the faucet and handle bases to prevent buildup, especially where water collects. If you use a wall-mounted spout, a quick pass with a microfiber cloth maintains a clean, airy look. When you refresh fixtures periodically, coordinated sets—like thoughtfully chosen shower sets or streamlined buying guides—can make planning easier. Did You Know? Above-counter basins can help preserve storage by allowing a slimmer vanity cabinet. A slightly sloped interior helps water drain quietly and reduces standing residue. Matte finishes tend to show fewer fingerprints than high gloss in busy bathrooms. Wall-mounted spouts free up counter space and can simplify daily wiping. Many bowl designs can retrofit onto existing vanities with minimal changes. Expert Tips Check reach: The water stream should land near the center of the bowl to prevent splash. Mind mirror height: Raise or lower slightly to maintain comfortable eye level with the bowl installed. Use a silicone bead under the base to reduce wobble and protect the countertop. Choose a drain finish that matches the faucet for a refined, unified look. Keep a soft towel near the basin for quick daily wipe-downs that extend shine. Personal Anecdote When I updated a small guest bath, I chose a compact oval bowl to save counter space. I paired it with a slim, tall faucet and a narrow mirror with rounded corners. The room felt calmer right away, and visitors noticed the gentle shape before anything else. The easy routine—wipe, rinse, and dry—made it simple to keep the space welcoming without extra effort. Summary & Takeaways A bowl-style bathroom basin blends beauty and practicality when planned with care. Start with comfort: total height, faucet reach, and splash control. Choose materials that fit your routine, from classic porcelain to stone or metal. Coordinate finishes for harmony, and keep maintenance simple with mild cleaners and a quick daily wipe. If you would like inspiration for fixtures that complement your look, browsing curated bathroom faucets can be a helpful starting point. Q&A Section How do I prevent splashing with an above-counter basin? Consider the faucet’s height and the angle of the water stream. A gentle arc that lands near the center of the bowl helps most. A slightly deeper or sloped basin also reduces splash. If you prefer a wall-mounted spout, set the projection so the water lands well inside the interior curve. What countertop materials work best? Durable surfaces such as quartz, granite, and solid-surface materials handle daily use well. Proper sealing helps stone resist moisture. If you love the warmth of wood, a water-resistant finish and attentive maintenance can keep it looking fresh. Always ensure the cabinet and counter support the bowl’s weight. Can I reuse my existing vanity? Often, yes. Check the final height with the bowl in place and verify faucet compatibility. You may need to adjust the hole layout for a tall faucet or plan a wall-mounted option. When updating several fixtures together, coordinated sets and finishes can simplify decisions and create a coherent, relaxing space. Is a grid drain better than a pop-up drain? Both can work well. A grid drain allows constant flow and avoids handling a stopper, which some people prefer for guest baths. A pop-up offers the option to hold water. Match the drain to the basin’s overflow design and your daily routine. How do I choose a finish that lasts? Look for quality plating or durable coatings and clean gently with mild soap. Brushed finishes tend to hide small marks, while polished surfaces reflect light beautifully. Coordinating with your shower and accessories—such as thoughtfully selected shower sets—can ensure a harmonious, enduring look. About the Author Written by Ava Chen, bathroom and kitchen fixture specialist at Allfixture. Ava focuses on practical, design-forward guidance that blends comfort with longevity. She has helped many homeowners choose balanced, beautiful solutions for busy homes. Thank you for reading—wishing you a calm, well-planned space.
Learn more
Undermount Sinks for a Sleek Durable Kitchen and Bath
Updated on: 2025-12-15 A streamlined kitchen begins with thoughtful choices, and a well-chosen undermount sink helps create clean lines and easy cleanup. This guide explains how to select materials, sizes, and edge styles, and how to pair the bowl with a compatible faucet for balanced performance. You will also find practical tips for installation readiness, care, and long-term durability. Explore gentle comparisons, pros and cons, and answers to common questions to feel confident about your next upgrade. Introduction: Why an Undermount Sink Elevates Everyday Living Product Spotlight Did You Know? Pros & Cons Analysis FAQ Section What size bowl fits my cabinet? Can I use this style with laminate or tile? How do I care for stainless and composite bowls? Which edge reveal should I choose? Conclusion & CTA About the Author Section Introduction: Why an Undermount Sink Elevates Everyday Living A below-counter bowl delivers a smooth counter-to-basin transition, so crumbs and water glide directly into the drain without catching on a rim. The look is refined, with the countertop surface flowing right to the edge of the bowl. Whether you enjoy quiet mornings or lively family cooking, this design supports a calm workspace and easy cleanup. Choosing the right combination of basin material, bowl size, and faucet height can feel complex. A simple framework may help. First, match the countertop: stone and solid-surface pair well with under-counter mounting because they offer strong support and clean edges. Next, size the bowl to your cabinet width and tasks. Large roasting pans, baking sheets, and stockpots prefer a generous single bowl, while multi-taskers may appreciate a double-bowl layout for rinse-and-soak flexibility. Finally, consider the faucet. A tall, well-angled spout with good reach often makes dish duty smoother. If you are exploring fixture pairings, you may find this overview helpful: modern faucet guide. In the sections below, you will find practical details, from edge reveals to sound dampening, plus a gentle pros-and-cons review. There is also a product spotlight with thoughtful faucet pairings, so your installation feels cohesive and comfortable. Product Spotlight A sleek, under-counter basin shines when paired with a graceful, easy-to-aim spout. Two styles can complement a seamless counter installation while supporting different preferences. For those who value purification at the sink, a dual-outlet fixture can be a considerate choice. The Wasser solid brass faucet offers a dedicated stream for filtered or purified water alongside standard flow, which may reduce clutter compared with a separate filter tap. Its solid brass body helps with durability, while the distinct handles make it easier to manage separate water lines. Pairing this faucet with a deep single-bowl design supports filling tall pitchers and cleaning large pans without splashback. Be sure to align spout reach with the bowl center to keep water landing comfortably over the drain. If you prefer a classic aesthetic with modern function, a pull-down sprayer in a heritage finish can be delightful. The antique brass pull-down faucet blends a warm tone with versatile spray modes for rinsing produce or clearing dishes. Its arched profile offers extra clearance over the bowl, which supports washing trays or baking sheets. The finish pairs well with natural stone counters, adding subtle contrast to the smooth, rimless sink opening. When choosing a fixture to match your bowl, a few guidelines can make decisions gentler: Height and reach: Ensure the spout comfortably covers the center of the basin without excessive splashing on the deck. Handle clearance: Check that lever motion does not bump backsplash or wall edges. Finish harmony: Consider how stainless, brushed nickel, or warm brass complements your counter color and cabinet hardware. Water tasks: If you fill tall pots often, a high-arc design may be helpful. If you rinse delicate glassware daily, a soft spray mode is reassuring. For broader browsing and coordinated looks, you may like to explore curated pieces in kitchen faucets. Thoughtful matching reduces visual clutter and can make your sink area feel balanced and welcoming. Did You Know? Edge reveals come in three common styles: zero (flush with the counter edge), negative (counter slightly overhangs the bowl), and positive (bowl edge slightly visible). Negative reveal often hides the seam and may help crumbs glide in. Stainless steel thickness is measured in gauge; lower numbers mean thicker steel. Many homeowners find 16–18 gauge offers a reassuring balance of sturdiness and value. Sound-dampening pads and undercoating can reduce clatter from dishes and running water. Granite composite and quartz composite resist scratches well and offer a matte, stone-like look that hides water spots. Rounded (radius) corners are easier to wipe, while tight corners maximize flat space for pans. Mounting clips and quality silicone sealant help create a dependable hold under the deck; support rails or brackets may be used for heavier bowls. Templates and accurate cutouts are essential for clean lines and proper alignment with faucet and accessories. Pros & Cons Analysis Pros Smooth cleanup: No top rim, so crumbs and water slide directly into the basin. Refined appearance: Seamless line from countertop to bowl enhances a minimalist look. Flexible sizing: Deep single bowls support oversized cookware; double layouts support multitasking. Comfortable ergonomics: With the right spout height and reach, everyday washing feels simpler. Material variety: Stainless, composite, and fireclay options suit different styles and budgets. Cons Countertop requirements: Typically suited to stone or solid-surface materials that hold clips securely. Precision needed: Accurate cutouts and careful sealing are important to avoid gaps at the edge. Installation access: Reaching clips and plumbing under the deck can be tighter than with a drop-in design. Potential chipping at the edge: Some counter materials may need gentle handling near the bowl cutout. If you also hope to refresh your shower or bath space, coordinated fixture finishes can bring harmony across rooms. You could consider items that echo your kitchen’s metal tones and handle styles for a subtle, unified home aesthetic. FAQ Section What size bowl fits my cabinet? Most base cabinets indicate a “minimum cabinet size,” which guides how wide a bowl can be. As a gentle rule of thumb, leave room for mounting hardware and the faucet. For example, a 30-inch cabinet often pairs with bowls around 27–28 inches, while deeper basins may require additional clearance for plumbing. Checking the specification sheet for outside dimensions, corner radius, and drain position can prevent surprises. Can I use this style with laminate or tile? Under-counter installations are most common with quartz, granite, or solid-surface because those materials support clips and clean cut edges. Laminate and certain tiles may not offer the same strength or edge finish without specialized methods. If your heart is set on laminate, a drop-in or flush-mount alternative might be kinder to the material. When in doubt, a professional fabricator’s advice is reassuring. How do I care for stainless and composite bowls? For stainless, a soft sponge with mild dish soap usually removes daily residue. Rinse and towel dry to reduce water spots. For composite or granite-look basins, gentle non-abrasive cleaners help keep the surface even. Avoid harsh scouring pads and strong chemicals. A sink grid can minimize scratches from heavy pots, and a strainer basket helps keep the drain area tidy. Which edge reveal should I choose? Zero reveal shows the cleanest seam, while negative reveal slightly overhangs the counter to hide the bowl edge. Positive reveal lets you see a small stainless lip and may aid in monitoring the seal. Many homeowners like the subtlety of negative reveal because crumbs and water are less likely to catch. If you prefer crisp lines, zero reveal can complement a minimalist style. Either way, precise templating and sealing are valuable. Conclusion & CTA A well-matched combination of counter, bowl, and faucet brings a sense of calm to everyday cooking. By considering bowl dimensions, material resilience, edge style, and spout ergonomics, you can create a workstation that works gently with your habits. If you are ready to explore fixtures that complement a rimless, below-counter installation, you may enjoy browsing Wasser solid brass faucet or discovering warm-toned options like the antique brass pull-down faucet. Thoughtful choices can help your undermount sink look and feel complete. About the Author Section Allfixture Editorial Team The Allfixture team researches kitchen and bath fixtures with a focus on practical design and long-term value. We test real-world usability, compare materials, and highlight gentle installation insights. If you would like more ideas for pairing bowls and spouts, you are welcome to explore our curated kitchen faucets. Thank you for reading—we hope this guide was helpful.
Learn more
Freestanding Bathtub Guide to a Spa Quality Bath Experience
Updated on: 2025-12-14 Thinking about a freestanding bathtub? This gentle guide clears up common myths, explains practical sizing and installation considerations, and offers a short, real-world story to help you decide with confidence. You will find simple maintenance tips, thoughtful layout ideas, and ways to coordinate fixtures for a cohesive look. The goal is to help you create a calm, comfortable bath retreat without stress or guesswork. Table of Contents Introduction Myths vs. Facts Personal Experience Final Thoughts & Takeaways Q&A Section What size tub fits a small bathroom? Do I need to move plumbing? Which material is easiest to maintain? About the Author Introduction A sculptural, standalone tub can turn an ordinary room into a quiet sanctuary. Yet choosing the right model can feel overwhelming. Sizes vary, floor plans differ, and installation details can seem complex at first glance. This article offers a calm, practical path forward. You will find clear explanations of common misconceptions, gentle advice on layout and comfort, and a short story from real-life renovation experience. We will also touch on fixture coordination, water supply considerations, and low-effort cleaning routines so you can focus on unwinding rather than troubleshooting. Freestanding Bathtub: Myths vs. Facts There is a lot of mixed advice about standalone tubs. The points below separate belief from reality, with friendly guidance to help you plan with care. Myth: These tubs only work in large bathrooms. Fact: Compact oval or slipper designs, often in the 55–60 inch range, can fit modest rooms with ease. A simple rule of thumb is to leave comfortable walking space around the tub (often 3–4 inches from walls on at least one side) and ensure the door swing or vanity area remains unobstructed. Myth: Installation demands major plumbing changes. Fact: Many projects need only small adjustments. Floor-mount drain kits and above-floor rough-in options reduce disruption. A licensed professional can confirm slope, venting, and trap placement, and suggest the most practical filler type (floor-mounted, deck-mounted on a nearby ledge, or wall-mounted spout). Myth: Cleaning around a standalone tub is difficult. Fact: Smooth exteriors and minimal seams make wipe-downs simple. Leaving a bit of clearance from walls and placing a soft-bristle mop or microfiber wand nearby helps. For routine care, mild soap and warm water often suffice; harsh abrasives are rarely necessary and can be avoided. Myth: Comfort is poor because there is no back support. Fact: Ergonomic shapes with a gentle recline support the neck and spine. Look for designs with a sloped back and a soaking depth that matches your preferences. If you like longer soaks, consider a slightly deeper basin and add a bath pillow for extra ease. Myth: Spills are inevitable without a built-in ledge. Fact: A handheld sprayer and a small side table or caddy keep essentials close by. Floor-mounted fillers often include a handshower, while wall-mounted options free up floor space. Thoughtful placement and a modest bath mat help keep droplets contained and the floor dry. Myth: Materials are fragile or too high-maintenance. Fact: Acrylic is lightweight, warm to the touch, and easy to clean. Solid-surface blends feel substantial and resist stains well. Cast iron is extremely durable, though heavier; confirm subfloor support if you choose it. Each option has strengths, so it is helpful to match the material to your habits and home. Myth: Matching fixtures is complicated. Fact: Coordinating is easier than it appears. Choose a filler finish that complements your bathroom faucets, then echo that finish in a towel bar or mirror frame. If your bath also includes a shower, consider a cohesive set—such as curated shower sets—to keep the space visually unified. Personal Experience During a recent refresh of a compact, light-filled bath, I worked with a homeowner who had always pictured a serene soaking corner. The room measured under 70 square feet, with a window that invited soft morning light. We explored a slim, 59-inch oval design with a gentle slope that supported the shoulders. The open floor beneath the tub made the space feel airy, and the clean silhouette brought instant calm. Installation decisions were approached slowly and respectfully. A professional verified that the drain could be nudged a few inches without altering the overall layout. We selected a wall-mounted spout for simplicity and a handheld sprayer for easy rinsing. To keep essentials nearby, a narrow bath table sat close to the rim. Finishes were coordinated with existing hardware and a few upgrades, including a couple of thoughtfully chosen pieces from the client’s wish list of best-selling fixtures. The result felt tranquil and practical. The tub encouraged quiet moments in the evening, and maintenance proved to be light, thanks to smooth surfaces and gentle cleaning habits. Final Thoughts & Takeaways With mindful planning, a freestanding bathtub can be both a statement piece and a source of daily comfort. It is helpful to focus on fit, filler type, and cleaning routine before you buy. A few small decisions—such as where to place a handheld sprayer, how much clearance to leave, and how to coordinate finishes—often make the biggest difference over time. Measure carefully, including doorways and hall turns for delivery access. Confirm subfloor support for heavier materials and consider weight when filled with water. Pick a filler style (floor, wall, or deck) that suits your plumbing and layout. Keep cleaning simple: mild soap, soft cloths, and regular light wipe-downs. Echo one or two finishes throughout the room for a calm, cohesive look. If you enjoy research, you may appreciate curated buying guides before finalizing your plan. Q&A Section What size tub fits a small bathroom? Many compact rooms are well served by models in the 55–60 inch range with a modest width and a softly tapered profile. Check clearances around the rim and confirm that doors, cabinets, and drawers open freely. If space is tight, place the tub near a wall on one long side to preserve a comfortable path through the room. Lightweight materials, such as acrylic, are easier to maneuver into smaller spaces and often feel pleasantly warm. Do I need to move plumbing? It depends on your current drain location and filler choice. Small adjustments are common and manageable, especially with above-floor rough-in kits or flexible trap placements. If you choose a wall-mounted spout, you may keep supply lines within the wall and reduce floor work. A floor-mounted filler offers flexibility for placement but may require a stable anchoring point. A licensed professional can evaluate slope, venting, and access panels to recommend the least disruptive path. Which material is easiest to maintain? Acrylic is often the most forgiving day-to-day: it wipes clean with mild soap and resists staining well. Solid-surface blends are also low-maintenance and feel substantial; they can be refreshed with gentle non-abrasive cleaners. Cast iron is highly durable and holds heat nicely, though it is heavier and may require subfloor checks. Whichever option you choose, simple, regular wipe-downs and soft cloths help preserve a smooth finish without harsh chemicals. About the Author Written by the Allfixture content team, specialists in thoughtful bath and kitchen fixture guidance. We focus on clear, kind explanations that respect your space, budget, and design goals. If you have questions, we are always glad to help you navigate options. Thank you for reading and wishing you a calm, beautiful home.
Learn more
Double Vanity Guide to Picking the Right Bathroom Pair
Updated on: 2025-12-13 Sharing a bathroom can be smoother with a well-planned vanity built for two. This guide walks through space planning, storage, materials, and installation basics so you can choose confidently. You will also find a practical checklist, quick answers to common questions, and gentle tips that help you avoid costly errors. Feel free to use the sections most relevant to your project and revisit them as your plan evolves. Common Mistakes Buyer’s Checklist Measure Your Space Plan Storage Choose Materials & Finishes Plumbing & Installation FAQ Section Wrap-Up & Final Thoughts Q&A Section About the Author When two people share a primary bath, a double vanity can gently reduce morning bottlenecks, add storage, and bring balance to your layout. The right choice depends on your room’s dimensions, plumbing, and daily habits. In the guide below, you will learn what to measure, which materials hold up, and how to plan fixtures that feel coordinated without fuss. If you are upgrading an existing bath or starting fresh, the tips here are designed to keep your project calm, clear, and on budget. Common Mistakes When Choosing a Double Vanity Prioritizing looks over layout: A stunning cabinet can still feel cramped if door swings collide or the walkway narrows. Confirm clearances around doors, drawers, and adjacent walls before you buy. Ignoring center-to-center spacing: Two basins should offer comfortable elbow room. Many people prefer about 30 inches from center to center, but confirm what feels right for those who will use it daily. Overlooking counter depth and faucet reach: Shallow counters paired with tall, rear-set faucets can splash. Check spout reach relative to the bowl’s drain to encourage a steady, tidy stream. Underestimating storage needs: Two users often mean more skincare, hair tools, and small items. Mix drawers for daily reach with deeper compartments for bulk goods and linens. Forgetting lighting and mirrors: Without thoughtful lighting, even the best cabinet struggles. Plan mirror width, sconce placement, and brightness so two people can prep without shadows. Assuming plumbing is “plug and play”: Existing rough-ins may not align with two sinks. It is helpful to confirm drain, supply, and vent positions early to avoid costly changes later. Buying materials that need constant fuss: Some counters etch or stain easily. If you prefer low-maintenance care, favor durable, sealed surfaces and water-resistant cabinet construction. Buyer’s Checklist Use this friendly checklist to compare options and keep your plan organized. Measure Your Space Measure wall width at multiple heights to confirm it is true and plumb. Note door swings, shower glass clearance, and hallway traffic lines. Allow comfortable aisle width; many find 36 inches in front of the cabinet pleasant. Check counter height preferences; 32–36 inches suits most adults, but measure what feels natural for you. Mark existing outlets and consider where hair tools will plug in. Plan Storage List daily-use items and assign easy-access drawers for them. Reserve deeper cabinets for towels and bulk supplies. Choose organizers that keep small items upright and visible. Consider a bank of center drawers if plumbing routes through the sides. Choose Materials & Finishes Cabinet box: Furniture-grade plywood often balances durability and value. Look for sealed edges and moisture-resistant finishes. Countertop: Quartz, porcelain slab, and sealed natural stone each offer distinct looks. If you prefer low upkeep, lean toward non-porous or well-sealed surfaces. Hardware: Solid-metal pulls feel sturdy and last. Test comfort and grip. Fixtures: Coordinated taps create a calm look. Explore thoughtfully matched bathroom faucets to complete your design. Plumbing & Installation Confirm valve locations, drain positions, and stud layout for secure mounting. Plan separate shutoff valves for each basin when possible. Decide on widespread, centerset, or wall-mounted taps early to place holes precisely. Coordinate with your shower plan for a unified look; matching finishes with your shower sets can feel cohesive. Dry-fit the cabinet before final plumbing connections to confirm level and spacing. FAQ Section What width works well for two users? Many shared layouts feel comfortable starting around 60 inches wide, which allows two bowls and usable counter surface. Larger rooms may support 72 inches or more. Carefully assess wall width, traffic space, and mirror placement before deciding. Do two sinks require two drains? Most two-basin configurations use separate bowls and trap assemblies. Your existing rough-ins may support this, but alignment varies by home. Checking with a licensed professional is a considerate step to verify local code and the simplest path forward. Which countertop materials are easiest to maintain? Engineered quartz and porcelain slabs are popular for everyday care because they resist stains and do not require frequent sealing. Sealed granite also performs well in many households. Whatever you choose, follow the manufacturer’s care guidance for best results. Wrap-Up & Final Thoughts Choosing the right two-basin vanity is about comfort, coordination, and easy upkeep. With clear measurements, smart storage, and durable materials, your bath can feel calm and welcoming for years. If you would like a gentle place to start, you might browse curated best sellers for inspiration, then review our practical buying guides to refine the details. When the plan feels balanced, selecting the right double vanity often becomes a pleasant finishing touch. Q&A Section Wall-mounted or freestanding: which suits small bathrooms? A wall-mounted, floating cabinet can make a compact room feel open by revealing more floor area. It also simplifies sweeping underneath. If you prefer extra storage and easier installation, a freestanding base can be a practical alternative. Undermount vs. vessel sinks: what is easier day to day? Undermount bowls offer a smooth wipe-down experience because there is no rim to clean around. Vessel bowls create a design focal point and can raise the effective height for taller users. Consider faucet reach and splash control when deciding. How can I set a thoughtful budget? List core items first: cabinet, counter, basins, faucets, and hardware. Then add allowances for plumbing parts, lighting, mirrors, and potential touch-ups to paint or tile. A small contingency for unforeseen adjustments can keep the process calm if plans shift. About the Author Written by the Allfixture Editorial Team, specialists in thoughtful bath and kitchen fixture guidance. We share clear, friendly insights to help you plan spaces that feel balanced and enduring. Thank you for reading, and we hope your project unfolds smoothly.
Learn more
Designing a Modern Bathroom Vanity for Style and Function
Updated on: 2025-12-12 Refreshing your bath space can feel easier with a clear plan. This guide walks you through benefits, key decisions, and simple steps so you can choose a vanity that fits your room and routine. You will also find sizing tips, care advice, and answers to common questions. We hope it helps you design a calm, functional space you enjoy every day. Introduction Key Benefits of a modern bathroom vanity Step-by-Step Guide Assess your space and users Set a budget and prioritize features Choose configuration and mounting style Select materials and finishes Coordinate fixtures and hardware Plan storage, plumbing, and installation FAQ Section What size vanity suits a small bathroom? Is wall-mounted or freestanding better? How do I care for my vanity? Summary & Final Thoughts About the Author Introduction A thoughtfully chosen vanity can transform daily routines. It offers storage, counter space, and a focal point that sets the tone for your bath. When selecting a modern bathroom vanity, it may help to balance style with maintenance, and pick features that fit the way you live. This article offers a gentle, step-by-step path so you can compare sizes, materials, mounting options, and finishes with confidence. For more helpful insights across the home, you might enjoy Allfixture’s curated buying guides. Key Benefits of a modern bathroom vanity Space efficiency: maximize floor area with wall-mounted designs or slim profiles. Clean lines: simple silhouettes create a calm, uncluttered look that adapts to many styles. Flexible storage: drawers, organizers, and shelves keep toiletries tidy and easy to reach. Durable materials: moisture-aware finishes and hardware resist daily wear and humidity. Design harmony: neutral tones and streamlined hardware blend with a wide range of tile and paint palettes. Improved lighting: open space under floating units can reflect light and make rooms feel larger. Resale appeal: timeless, minimal choices tend to age well and suit different tastes. Step-by-Step Guide Assess your space and users Start by measuring wall width, room depth, and door swing. Note plumbing locations and window height to understand limits and opportunities. Consider who uses the bathroom and when: a shared space might need double bowls or wider counters, while a powder room may benefit from a slim, space-saving console. Pay attention to traffic flow so doors, drawers, and towel bars open freely without crowding. Set a budget and prioritize features A clear budget helps you focus on what matters most. You might prioritize cabinet construction, countertop durability, drawer organizers, or soft-close hardware. It may be helpful to leave a small allowance for faucets, mirrors, and lighting so the final design feels cohesive. Think long term: a sturdy cabinet and reliable finish can reduce maintenance and replacement costs over time. Choose configuration and mounting style Decide between single- or double-basin designs based on space and routine. Single-bowl cabinets suit compact rooms and leave more counter area. Double-basin units serve busy households. Next, consider mounting: a wall-hung unit creates an airy look and eases floor cleaning, while a freestanding console offers a classic presence and straightforward installation. Matching the depth to your room can keep walkways comfortable. Select materials and finishes Moisture-friendly materials tend to perform best in bathrooms. Look for furniture-grade plywood, solid wood with protective finishes, or engineered options designed for humidity. For counters, quartz, porcelain, and sealed stone are popular for durability and easy care. Finishes like matte white, warm oak, or textured laminates can soften the overall look. Choose quality hardware with corrosion resistance so handles and slides stay smooth in damp conditions. Coordinate fixtures and hardware Faucets, shower components, and accessories help complete the design. Consider aligning metal tones and silhouettes for a unified feel—brushed nickel, chrome, or warm brass each create a distinct mood. If you are updating more than the vanity, browsing a focused collection can save time. For example, explore Allfixture’s selection of bathroom faucets and curated shower sets to find complementary pieces that suit your sink and layout. Plan storage, plumbing, and installation Map out what you store daily and assign drawers or shelves for each category. Check trap height and supply lines so the cabinet clears plumbing and drawers operate freely. If installing a floating unit, confirm wall structure and anchor points. For stone or solid-surface counters, ensure accurate cutouts and careful sealing around sinks and backsplashes. A calm, stepwise plan can make installation smoother and protect finishes from accidental damage. FAQ Section What size vanity suits a small bathroom? In compact spaces, cabinets around 18–30 inches wide often feel balanced. Shallow depths help circulation and reduce door conflicts. Consider a wall-hung unit to open the floor plane and increase the sense of space. A single, centered bowl can also provide more usable counter area for daily essentials. Is wall-mounted or freestanding better? Both work well; it depends on your priorities. A wall-mounted cabinet looks light and makes floors easy to clean, but needs secure wall framing. A freestanding piece offers a familiar look and can simplify installation. If your layout changes often, freestanding may be more flexible; if you want an airy, minimalist feel, wall-mounted can be a gentle choice. How do I care for my vanity? Wipe spills promptly and use mild, non-abrasive cleaners. Keep standing water away from seams and hardware, and ensure ventilation to reduce humidity. Periodically check caulk lines around sinks and backsplashes. For wood finishes, follow the manufacturer’s care instructions, and avoid harsh chemicals that can dull protective coatings. Summary & Final Thoughts Choosing a vanity becomes easier when you measure carefully, set priorities, and coordinate fixtures with a simple palette. With clear steps and a calm plan, you can create a space that feels open, organized, and welcoming. If you would like inspiration and ready-to-ship options, explore Allfixture’s best-selling selections. A thoughtfully chosen modern bathroom vanity can be a graceful anchor for your daily routine. About the Author Written by the Allfixture editorial team. We research bath and kitchen fixtures, materials, and layout tips to help you plan with clarity. Our guides focus on practical steps and timeless style. Thank you for reading—we hope your next project feels smooth and satisfying.
Learn more
Bathroom Finishes Durable Styles for a Timeless Bath
Updated on: 2025-12-11 Designing a bathroom that feels calm, cohesive, and easy to care for starts with the right mix of materials, colors, and metal tones. This guide walks through a thoughtful process to help you select surfaces, trims, and fixtures that work beautifully together. You will also find practical tips for durability and maintenance, plus ideas for testing choices before you commit. By the end, you will feel more confident choosing bathroom finishes that reflect your taste and support daily comfort. Table of Contents 1. Practical Guide 1.1 Define your vision and constraints 1.2 Choose a color story 1.3 Select primary surfaces 1.4 Pick metal tones and hardware 1.5 Coordinate plumbing fixtures 1.6 Decide on countertop and vanity materials 1.7 Balance textures and sheen 1.8 Create a sample board and test 2. Key Advantages 3. Summary & Next Steps 4. Q&A Section 5. About the Author Choosing materials and metals for a bath can feel complex, especially with so many beautiful options. A gentle plan can make the process enjoyable. In the guide below, you will find a clear path to align look, feel, and function. We will consider color, surfaces, plumbing fittings, and care requirements, so your space looks inviting and serves your routine with ease. To support your decisions, we will also explore simple ways to test combinations before anything is installed. Practical Guide to Bathroom Finishes Define your vision and constraints Begin by noting what you love and what you need. Gather three to five inspiration images and highlight shared traits, such as warm neutrals, matte metals, or patterned tile. Next, outline practical limits: budget, moisture exposure, and how much time you prefer to spend on cleaning. This short list will guide all choices and help you avoid overbuying or selecting materials that do not fit your lifestyle. Choose a color story Pick a simple palette of two to three main hues with one accent. Many people select a quiet base (white, cream, taupe, or soft gray), a grounding shade (charcoal, olive, or navy), and a subtle highlight (brass, blush, or natural wood). Keep undertones consistent: warm with warm, cool with cool. A cohesive color story makes tile, paint, and metals feel harmonious and calm. Select primary surfaces Surfaces set the tone. Porcelain tile offers stability and broad styles, from stone looks to terrazzo patterns. Ceramic works well for walls and niches. Large-format tile reduces grout lines and visual busyness, while smaller mosaics add character underfoot. If you prefer painted walls, consider moisture-resistant formulas and add ventilation. In wet zones, prioritize slip resistance and easy-clean grout in a matching or slightly darker shade. Pick metal tones and hardware Metal accents bring a room to life. Brushed nickel, matte black, polished chrome, and warm brass each create a distinct mood. If you enjoy mixing metals, choose one dominant tone and one supporting tone for balance. Keep the same sheen family where possible (all brushed or all polished) so pieces feel like a set. Hardware, towel bars, and trim should echo your chosen metal story. Coordinate plumbing fixtures Plumbing pieces bridge style and function. Consider silhouette, handle shape, and spray options along with finish. Explore curated collections for bathroom faucets that match your metal choice, and review shower sets for compatible valves and trims. If you enjoy a timeless look, a solid brass shower set can provide durability and a classic presence that pairs nicely with stone-look tile. Decide on countertop and vanity materials Countertops should be durable and straightforward to maintain. Quartz is a popular, low-care option with many patterns. Solid surface materials offer smooth seams and gentle edges. If you like natural stone, consider honed finishes to minimize etching visibility. For vanities, sealed wood tones add warmth, while painted cabinetry can reinforce your color story. Choose simple, well-sealed edges for easier cleaning. Balance textures and sheen Contrast creates comfort. Pair smooth countertops with subtly textured tile, or matte metals with glossy walls. If floors are textured for grip, keep the shower walls calmer to avoid visual noise. Sheen also matters: matte reduces glare and fingerprints, satin offers a gentle glow, and polished reflects more light. A balanced mix helps the room feel layered yet peaceful. Create a sample board and test Collect swatches and samples and view them together in natural and artificial light. Place tile next to metal pieces, a countertop chip, paint swatches, and a cabinet finish. Observe them morning and evening to see how tones shift. If possible, test a grout color on a small board. This step often reveals whether your selections feel cohesive—or if a subtle adjustment will improve the whole space. Key Advantages Clarity: A simple plan reduces overwhelm and speeds up decisions. Harmony: Consistent undertones and coordinated metals create visual calm. Durability: Materials chosen for moisture and wear handle daily use more gracefully. Maintenance ease: Thoughtful selections reduce effort over the long term. Budget control: A defined palette limits impulse purchases and rework. Confidence: A sample board allows you to test choices before installation. Summary & Next Steps A peaceful bath starts with a concise vision, a restrained color story, and compatible surfaces. By choosing durable materials and coordinating metals and fixtures, you set your space up for comfort and easy care. If you would like more support with selections, browse practical design tips in our buying guides. With a few samples and a quiet plan, your approach to bathroom finishes can feel clear, organized, and rewarding. Q&A Section What finish helps reduce visible water spots? Brushed and matte metal tones usually show fewer spots and fingerprints than highly polished options. Brushed nickel and satin brass are good examples. Texture and sheen help disguise water marks, and regular gentle wiping keeps surfaces looking fresh. If your water is mineral-rich, consider a squeegee-and-cloth routine for quick care after showers. How can I mix metals without clashing? Pick one dominant metal and one supporting metal, then repeat them in at least three places each. For instance, use brushed nickel for faucets and shower trims, and introduce matte black in hardware and a mirror frame. Keep undertones aligned—cool with cool, warm with warm—and aim for similar sheen levels so the mix feels intentional rather than random. Which materials are easiest to maintain in a busy household? Porcelain tile, quartz countertops, and brushed metal trims tend to be straightforward. Porcelain resists moisture and staining, quartz handles daily use well, and brushed metals minimize visible smudges. Large-format tile with matching grout lines also helps reduce cleaning effort. Simple silhouettes with fewer ridges or grooves can further simplify upkeep. About the Author Allfixture shares practical, design-forward guidance to help people choose fixtures and materials with confidence. Our team blends product knowledge with real-world installation insights to simplify decisions. We focus on clarity, durability, and timeless style across kitchens and baths. Thank you for reading—we hope this guide supports your next project.
Learn more