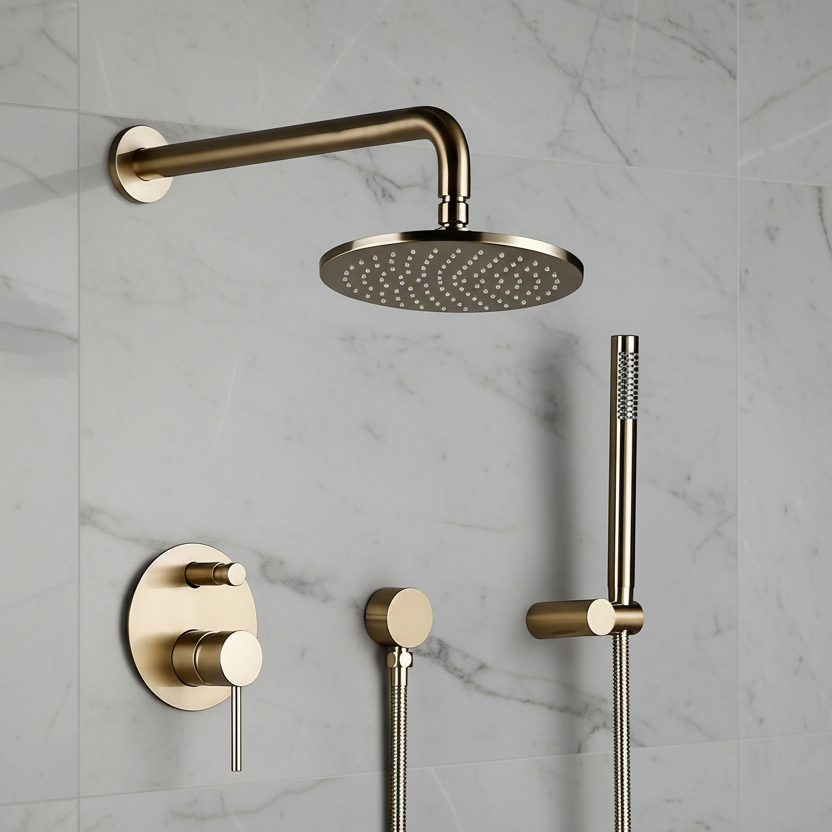
A complete shower system replaces the guesswork of buying a valve, a head, a hose, and an arm separately — everything arrives matched, in one finish, engineered to work together. It's also the single most transformative fixture upgrade in a bathroom, and the one where a wrong choice is hardest to undo, because the valve lives inside the wall. This guide walks the entire decision: what's in the box, which configuration fits your bathroom, how to match the system to your water pressure, and which finish will still look right in ten years.
What "Complete Shower System" Actually Means
At minimum, a complete system includes a mixing valve (the in-wall body that blends hot and cold), a showerhead, and the trim — the visible plate and handles. Most systems in our range add a handheld sprayer on a hose, and many include a tub spout or a slide bar. The advantage over piecing it together yourself is threefold: every component shares a finish batch (so nothing is a near-miss), the flow rates are matched to the valve, and one order covers the whole install.
Step 1: Choose Your Valve Type
This is the decision that matters most, because the valve is what goes inside the wall. Two technologies dominate:
| Pressure Balance | Thermostatic | |
|---|---|---|
| How it works | Holds hot/cold pressure ratio | Holds actual temperature |
| Accuracy | Within a few degrees | Within about one degree |
| Controls | One handle (temp + flow) | Two (temp and flow separate) |
| Multi-outlet | Limited — outlets take turns | Excellent — built for it |
| Cost | $ | $$–$$$ |
Short version: pressure balance for guest baths and budget-conscious installs; thermostatic for a primary shower, for households with fluctuating pressure, or any system running a rainfall head plus a handheld. Our full breakdown lives in thermostatic vs pressure balance shower valves.
Step 2: Pick Your Configuration
Step 3: Match the System to Your Water Pressure
This is the step most buyers skip, and it's why some expensive showers disappoint. A rain head spreads flow across a wide face and relies on gravity rather than velocity — so it feels weakest exactly where household pressure is marginal. Test your pressure with a $10 gauge on an outdoor spigot: 45–80 PSI is healthy. Below 40, choose a smaller-diameter head (8 inches beats 12) and prioritize the handheld, which concentrates flow. If you're already fighting weak flow, our guide to rain shower low pressure covers the fixes.
Step 4: Choose the Finish
Finish is where personal taste meets practicality, and the shower is the harshest environment in the house for any metal — constant humidity, soap, and in many homes, hard water.
Shop by the finish that suits your routine: gold shower systems, matte black, brushed nickel, chrome, gunmetal, rose gold, or antique brass.
Step 5: Verify the Build Quality
Two specifications separate a system that lasts twenty years from one that fails in three: a solid brass valve body and ceramic disc cartridges. Brass resists corrosion in permanently humid conditions where zinc alloys pit and fail; ceramic discs seal without the rubber washers that wear out and drip. Every shower system in our range is built on both — check the specifications table on any product page to confirm what you're buying elsewhere.
Installation Realities
In-wall systems require access to the wall behind the shower, which makes them a remodel project or a job for a plumber cutting an access panel. Exposed pipe systems mount to the surface and connect to an existing shower supply, which is why they're the go-to retrofit. Either way, replacing a valve with a different valve type means opening the wall — so decide between pressure balance and thermostatic before the tile goes up, not after.
Frequently Asked Questions
Can I install a complete shower system myself?
Exposed pipe systems are within reach for a confident DIYer. In-wall systems involve the wall cavity and often soldering or PEX connections — most homeowners hire a plumber for the rough-in and handle the trim themselves.
Do I need a special valve for a rainfall head?
Not special, but sized correctly. A standard valve runs a single rain head fine. Running a rain head and handheld simultaneously is where a thermostatic valve with adequate flow capacity earns its price.
What size rainfall head should I choose?
8–10 inches suits most bathrooms and most water pressure. 12 inches and up delivers the drenching spa look but needs strong pressure to feel satisfying — and a taller ceiling to look right.
Will a new shower system fit my existing plumbing?
Standard US installations use 1/2-inch supply connections, which our systems match. What varies is the valve body depth and the rough-in position, so confirm those against your wall cavity before ordering.
How long does a quality shower system last?
With solid brass construction and ceramic cartridges, twenty years or more is realistic. Cartridges are replaceable wear items — swapping one is routine maintenance, not a failure.
Considering antique brass? Read the complete guide: Antique Brass Bathroom Fixtures.
Budgeting your project? See How Much Does It Cost to Install a Shower System.
Choosing your shower head? See Rainfall vs Handheld Shower Head.